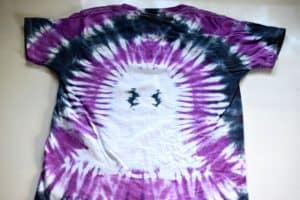
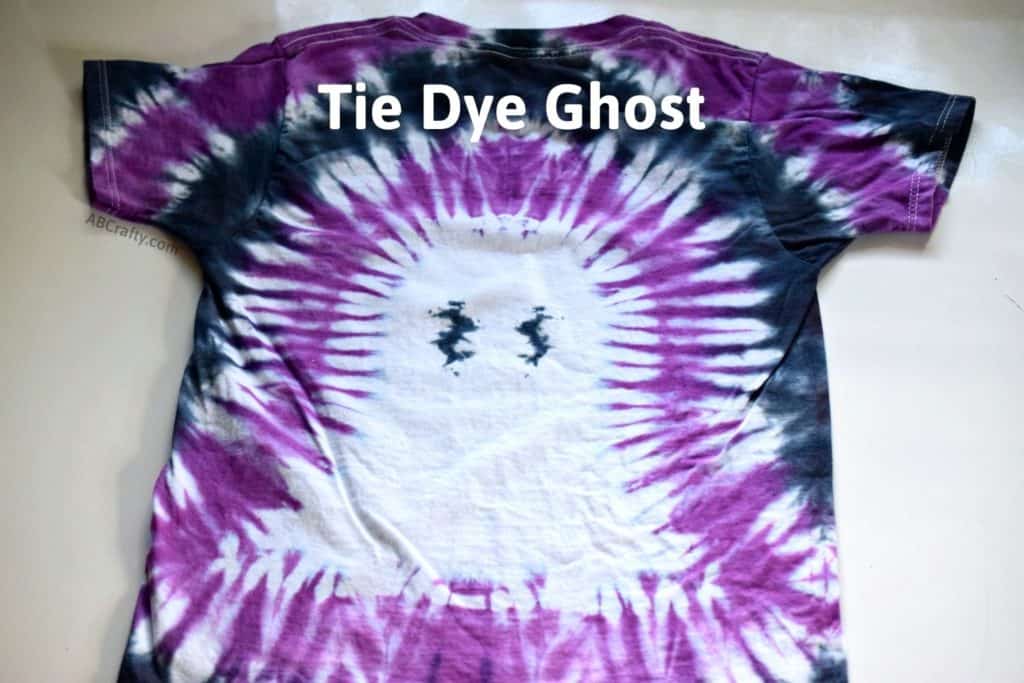


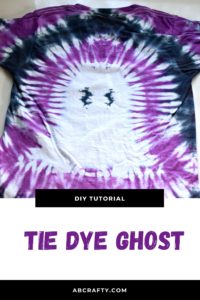
Ghost Tie Dye Shirt
Learn how to make a ghost tie dye design on a shirt. Follow easy steps to dye your own tie dye ghost to make your own customized Halloween tie dye shirt.
Materials
- 1 White Cotton Shirt
- Washable Marker
- Rubber Bands or Zip Ties
- Tie Dye Kit or Tie-Dye Dye and Soda Ash
- Water
- 1 pair Rubber Gloves
- Plastic Wrap
- Paper Towels
Equipment
- Plastic Bin or Bucket
Instructions
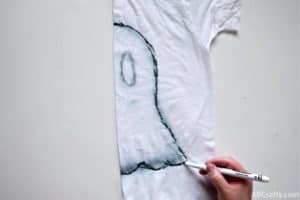
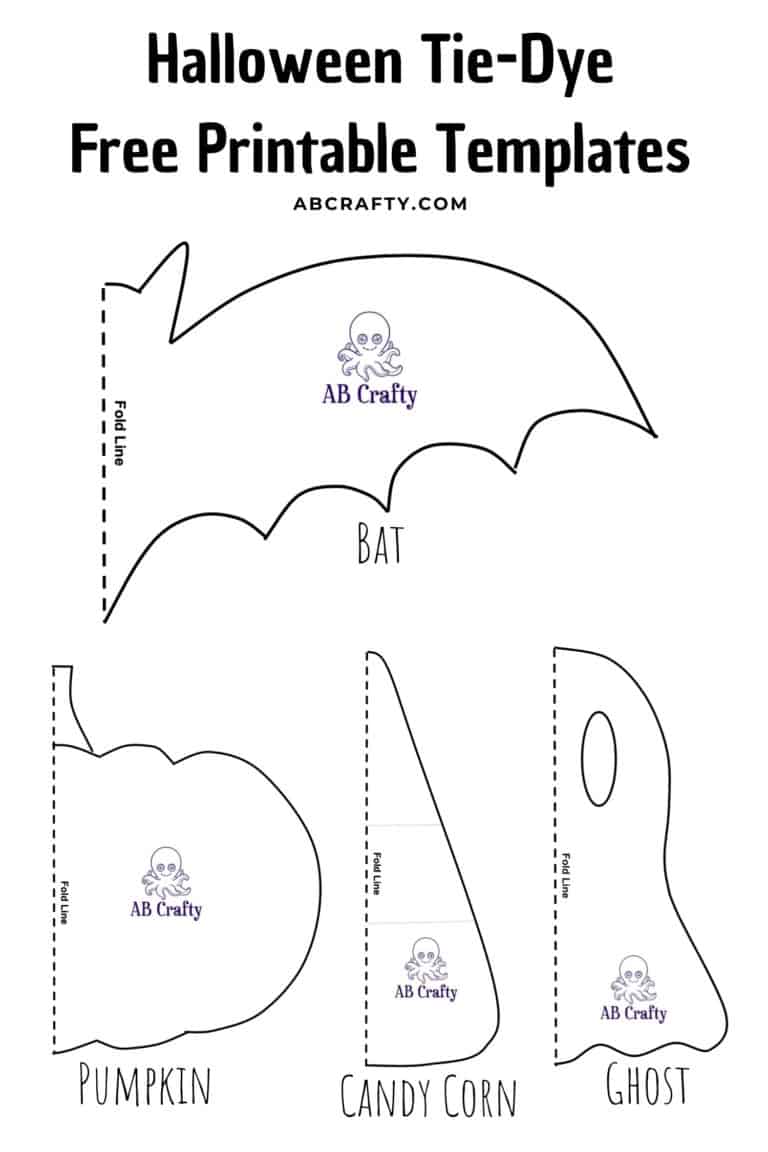
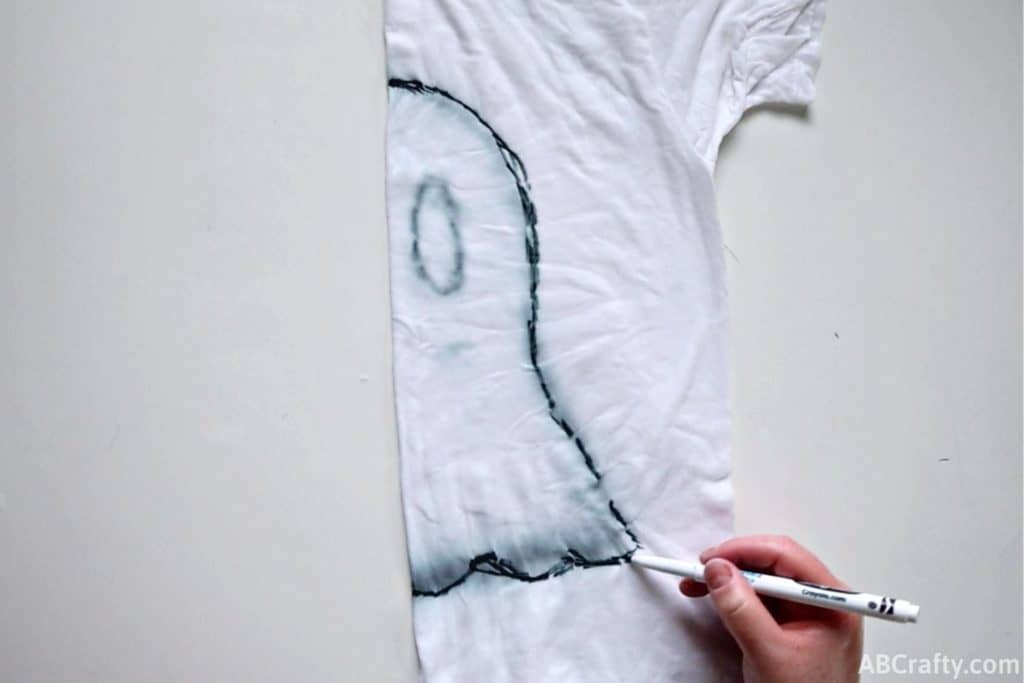
- Fold the shirt in half and draw half of a ghost design and an eye with a washable marker.1 White Cotton Shirt, Washable Marker

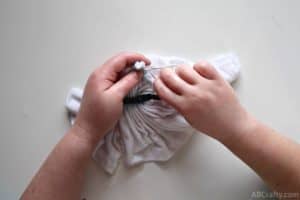
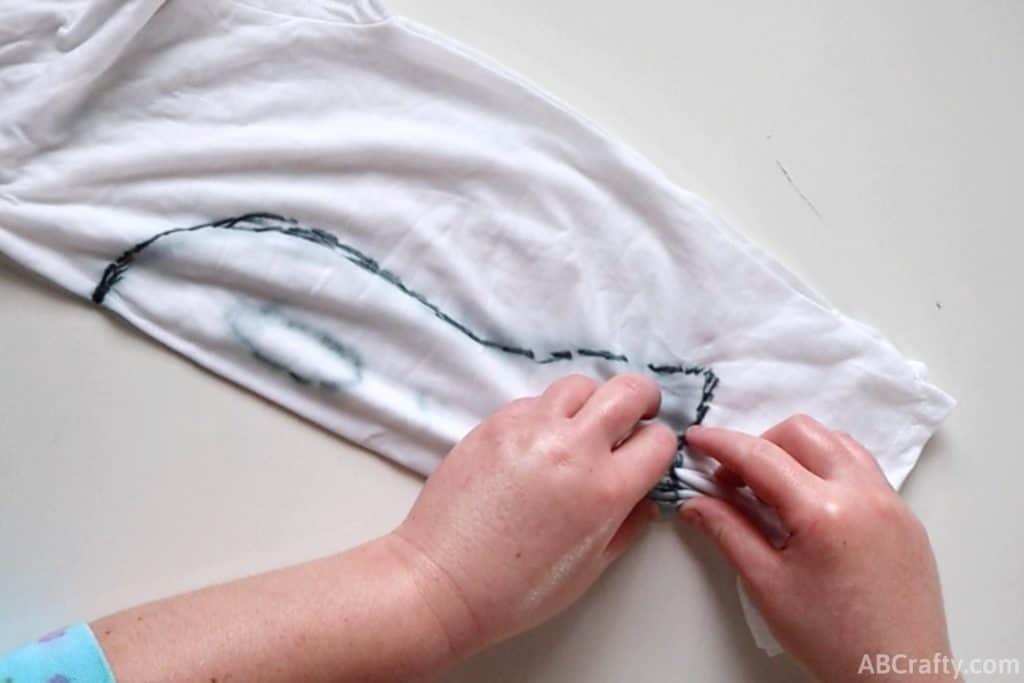
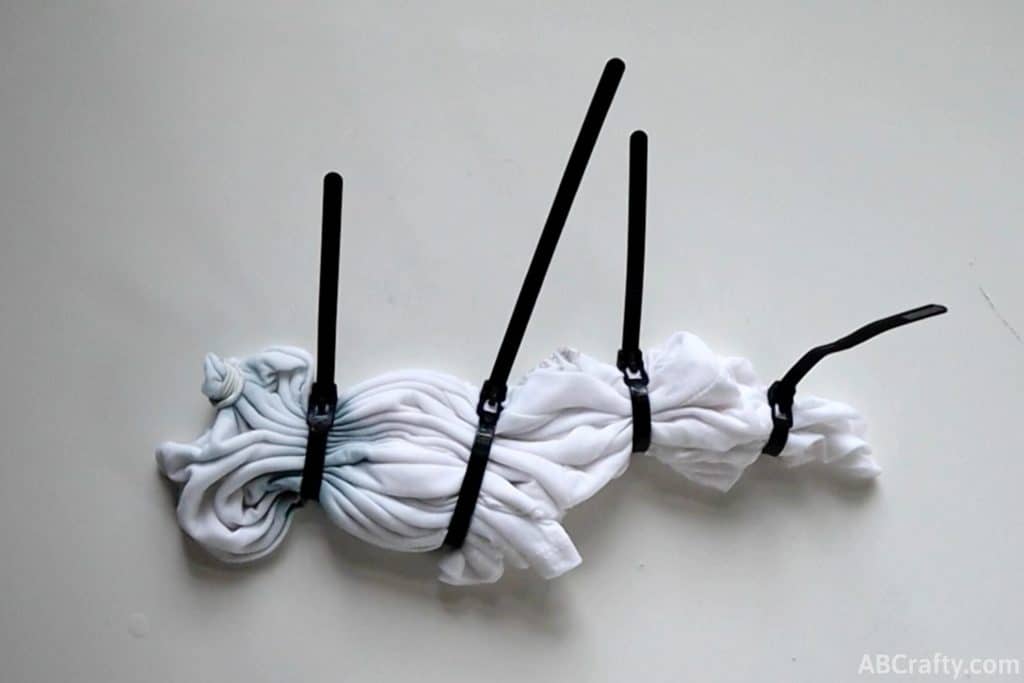
- Make an accordion fold along the line, keeping the line straight as you fold. Move and turn the shirt so that the line stays straight.
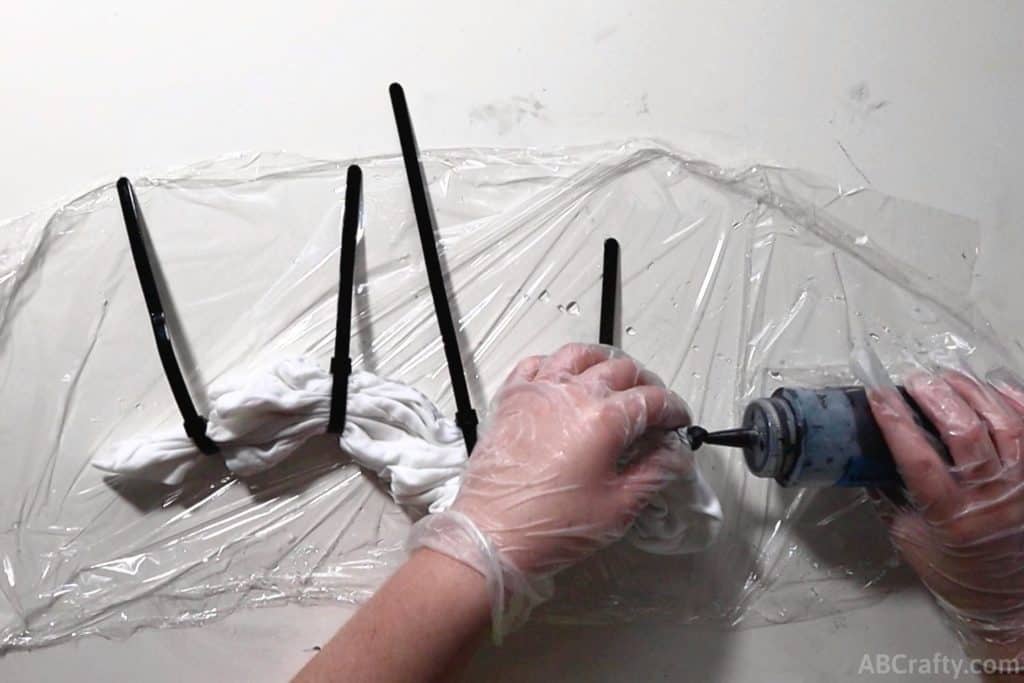
- Wrap a rubber band or zip tie along the marker line.Rubber Bands or Zip Ties
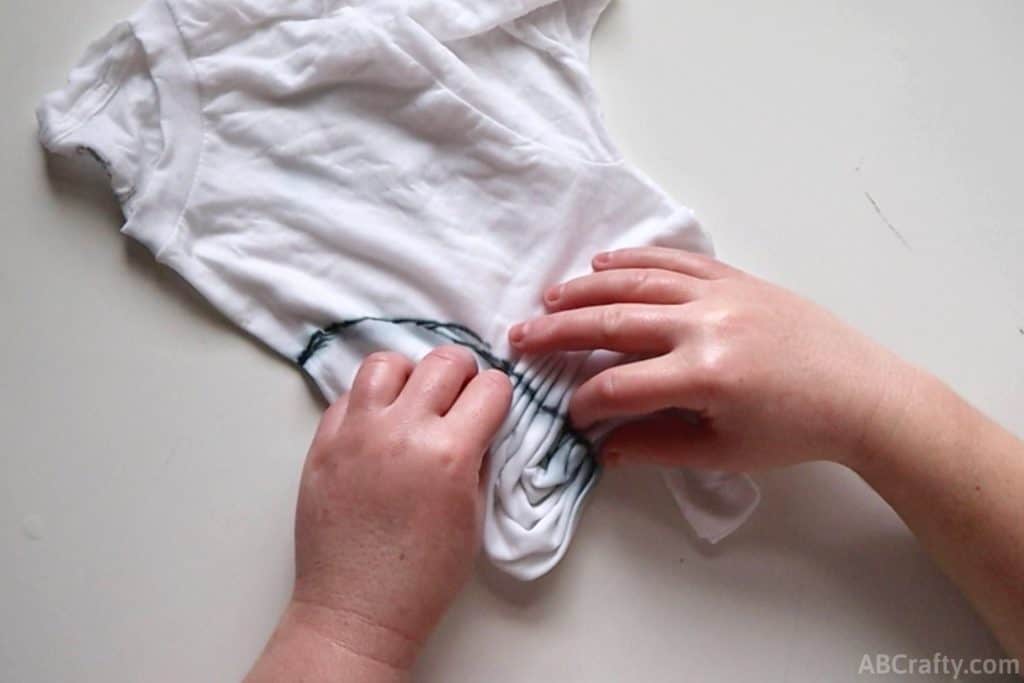
- Wrap a rubber band around the drawn eye.
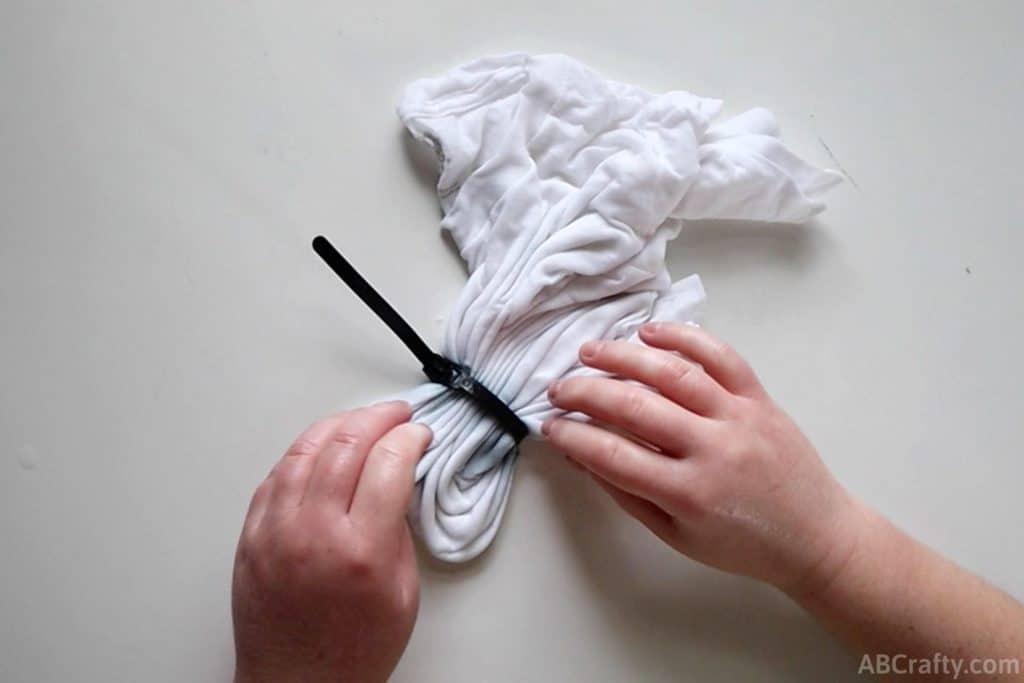
- Fold the rest of the shirt and secure it with zip ties and rubber bands.
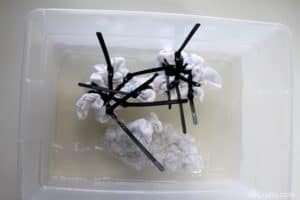
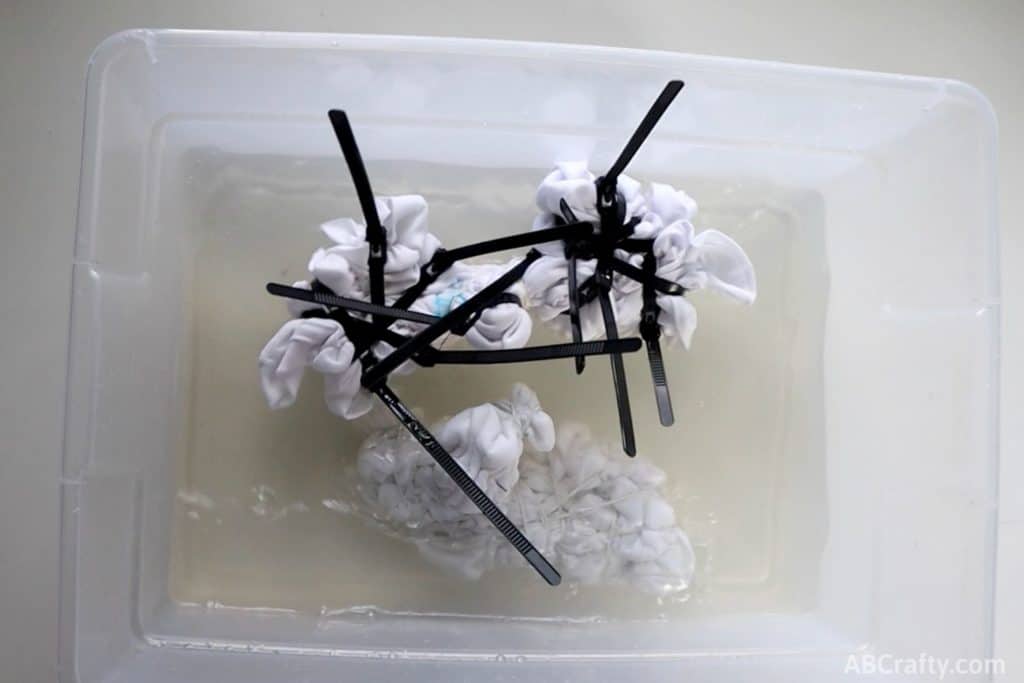
- Mix 1 cup of soda ash with one gallon of water. Stir it until the soda ash is completely dissolved.Soak the shirt in the soda ash solution for 20 minutes.Tie Dye Kit or Tie-Dye Dye and Soda Ash, Water
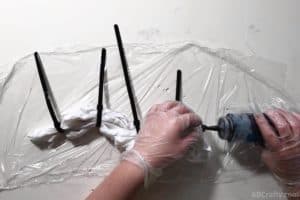
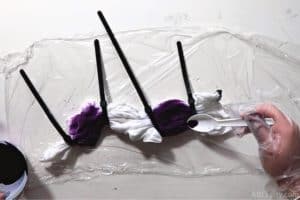
- Place plastic wrap on the table and put on gloves.Squeeze black dye onto the small sectioned off eye. Be sure to only get the dye on that section as the next section will stay white.1 pair Rubber Gloves, Plastic Wrap
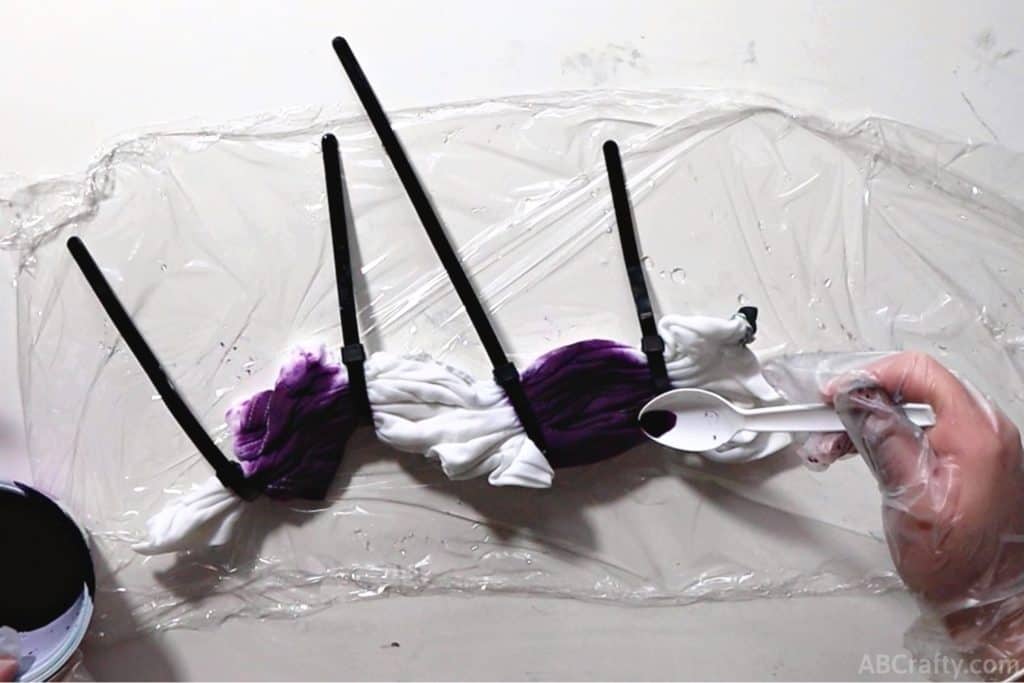
- Skip a section next to the eye, then add purple to the following section. Skip another section and add purple to that section.
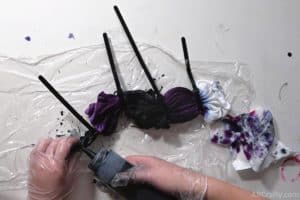
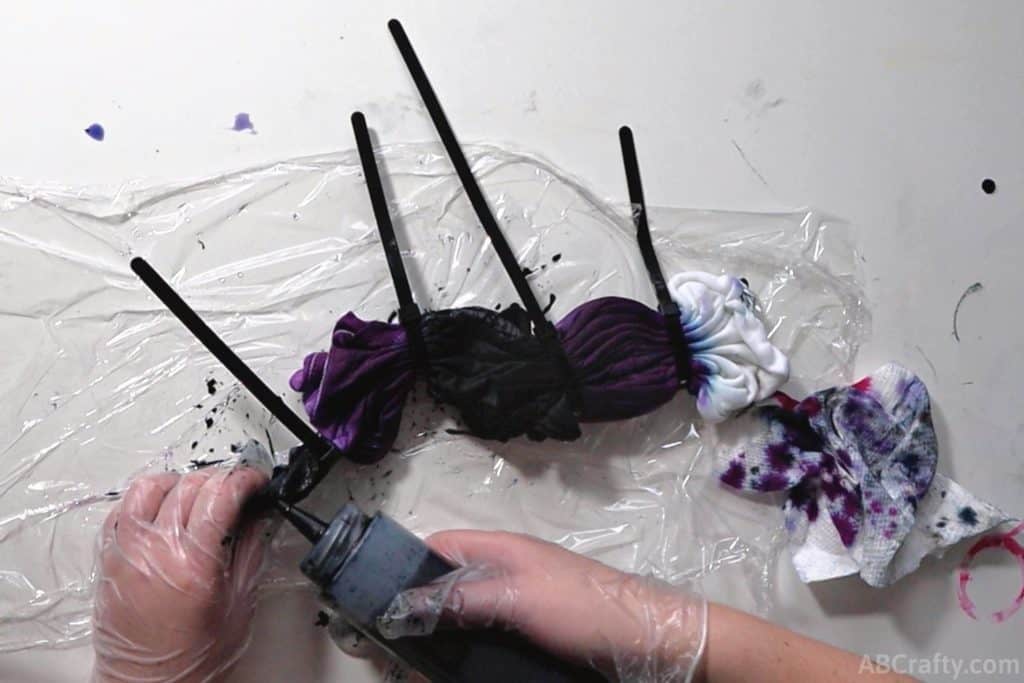
- Dye the remaining sections black. Make sure to still keep that first section next to the eye white.As you dye the shirt, wipe up the area with the paper towel to prevent the dye from going where you don't want it.Paper Towels
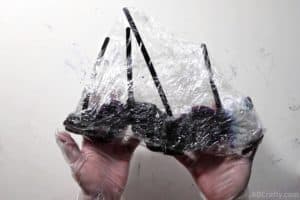
- Once your shirt is completely dyed, wrap it in plastic wrap and let it set for at least 6 hours, but I recommend a full 24 hours.
- Rinse it in the sink and remove the ties. Gradually increase the water temperature until the water runs clear. Then wash the shirt in the washing machine with other tie dye clothing and dry it.