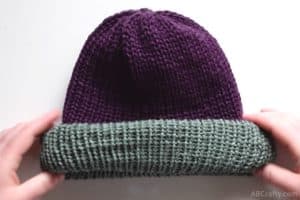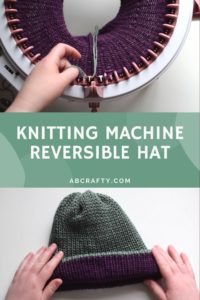
Sentro Knitting Machine Reversible Beanie
Learn how to use a Sentro knitting machine to make a quick and easy reversible knit hat. From start to finish it only takes about an hour to knit an entire beanie.
Materials
- Yarn in two contrasting colors Max weight you want to use is worsted weight. I used 3 strands of fingering weight as one strand
Equipment
- Sentro Knitting Machine
- Plastic Needle
- Pair of Scissors
Instructions
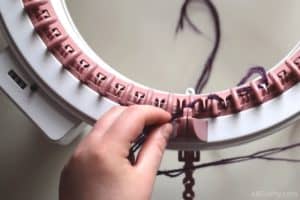
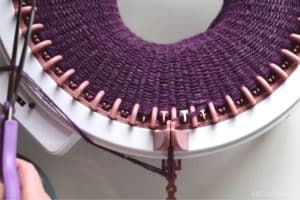
Cast on your first row
- Measure roughly a foot of yarn and allow that end to hang into the middle of the machine. Pass the yarn in front of the white needle, moving from right to left.
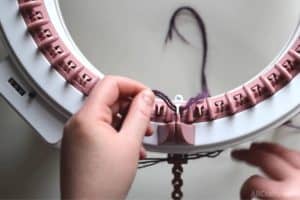
- Turn the crank on the knitting machine slightly so that the next needle moves in front of the yarn holder. Then pass the yarn behind this needle.
- Turn the crank again to move to each needle, alternating passing in front and behind each needle.
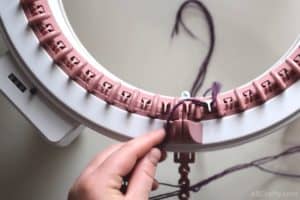
Knit the next 3-50 rows
- Once you get to the white needle again, pass the yarn again in front of the white needle.
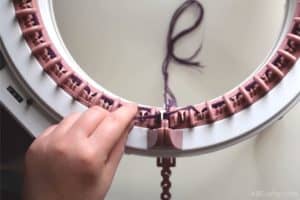
- From now on you do not need to pass the yarn behind the needles. You will simply put the yarn in front of the needles. Continue to work slowly and slowly crank the knitting machine while you make sure the yarn is in front of the needles and that each needle pulls the yarn into the machine.
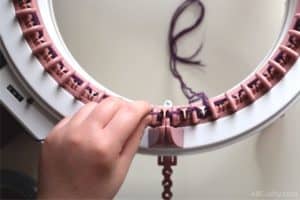
- After you finish the second row with the yarn only in front of the needles, you no longer have to hold the yarn yourself. Pull the yarn through the yarn holder.
- After pulling the yarn through the holder, you can then place it through the yarn tensioner.

- Once you have the yarn set, you can crank the knitting machine carefully for the next few rounds. Keep an eye out for any dropped stitches. These first 3-4 rows are the most important. After the first 3-4 rounds you can then start moving more quickly.Continue until you knit 50 rows of the first color. After your 50 rows, end with the white needle to the right. Then cut the end so that you have about a foot of extra yarn.
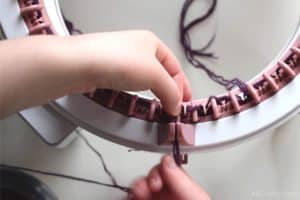
Changing colors
- Remove the purple yarn from the tensioner and yarn holder. Place it towards into the middle of the knitting machine between the white needle and the needle to the left of it.Then with your next color (I used the same yarn, but in a light green color), measure out a foot of yarn and again put that end towards the middle. Pass the rest of the yarn in front of the next needle.
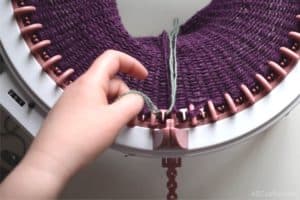
- Knit another 50 rows with this new color and again end the last row with the yarn passing in front of the white needle.

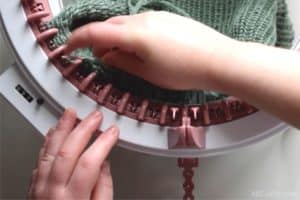
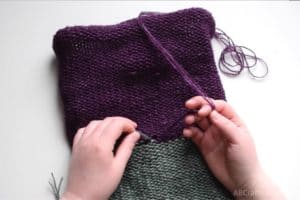
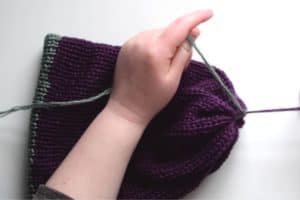
- Thread your plastic needle with the yarn. Then crank the machine a full row around. This will allow the machine to finish the last row.

- Starting with the needle to the left of the white needle, push the plastic needle through the loop. Move from the middle of the machine to the outside.
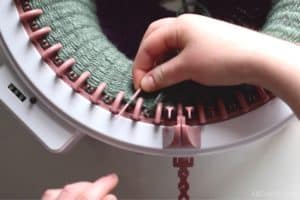
- Pull the yarn through the loop.

- Continue needle by needle lifting the loops onto the plastic needle.
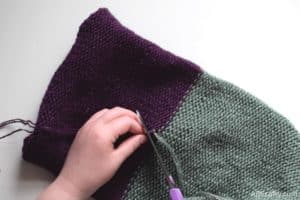
Finish the knit beanie
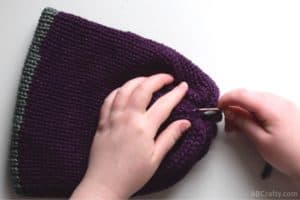
- Pull the project inside out and find the ends of the yarn from when you changed colors. Tie them into a knot
- Once secure, cut off the ends.
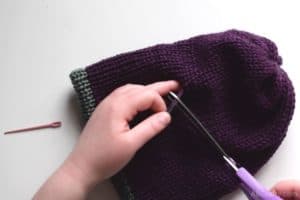
- You're now going to close those ends, but it it's easiest to do them one at a time. Start with the one on the inside and pull on the end of the yarn so that edge starts to close. Carefully pull it tight and move the stitches to form a tight circle.
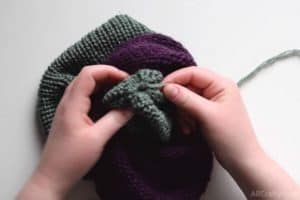
- After you have the hole closed on the inside edge, keep the end of the yarn outside and close the end of the other color.
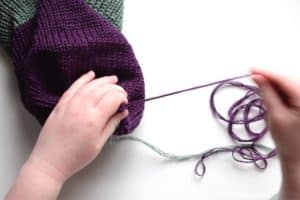
- Once you close both sides, tie the ends of both colors together into a secure knot.
- Thread the ends onto the plastic needle and sew it into the knit beanie between the two layers.
- Come out part way through the knit beanie and cut off the excess so that the rest of the yarn is hidden between the layers.
- Enjoy your new reversible knit beanie made on a Sentro knitting machine