How to Make Yarn Pom Poms
Easily learn how to make yarn pom poms with a pom pom maker in just a few minutes!
Materials
- Yarn
Equipment
- 1 Pom Pom Maker
- 1 Pair of Scissors
- 1 Yarn Bowl optional
Instructions
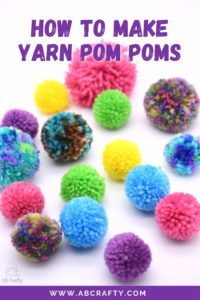
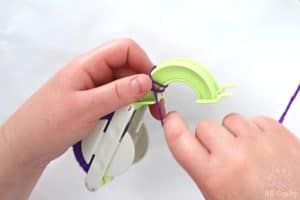
- Start by opening half of the pom pom maker (this is the set I have). Wrap the yarn around both colored parts, crossing it over the first wrap to secure the end of the yarn.Yarn
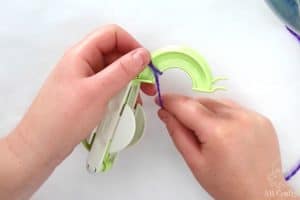
- Continue wrapping around, pushing the wrapping to one side to fit more in. Once the first layer is filled, continue wrapping on top. Keep the layers even.
- Continue wrapping until you’ve filled up the side. You should be able to close it and there aren't gaps.
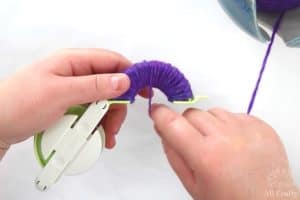
- Repeat the process on the other half.
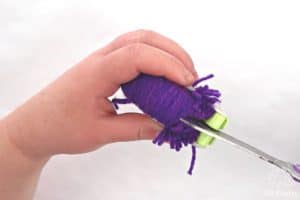
- Cut the yarn between the top and bottom colored parts. Repeat on the other half.
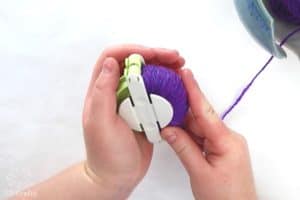
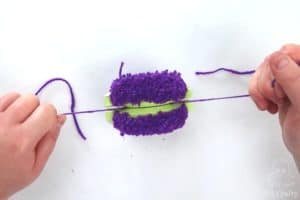
- Cut a longer piece of yarn and wrap it around the middle of the pom pom maker, between the top and bottom colored parts. Pull it tight and tie it in a knot.
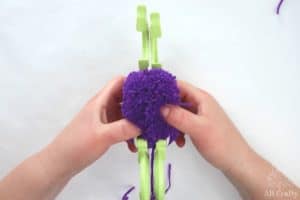
- Pull the tabs of the colored parts of the maker to open both halves.Holding each half, separate the pom pom maker to release the pom pom.
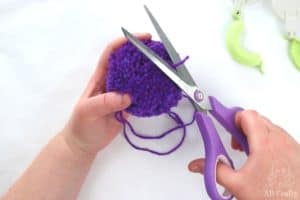
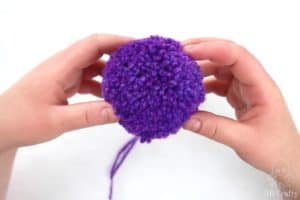
- Trim the pom pom so it's perfectly round.
- If you're attaching it to a hat, leave the tails. Now your pom pom is ready to use!
Notes
Tip: For the first row, keep the yarn a little loose. As you add additional rows you can make it tighter. This will help the yarn be more similar in length (otherwise the bottom yarn will be much shorter than the top layers).
Tip #2: Push the yarn to one side as you wrap to fit in more loops.
Tip #3: Use a yarn bowl to keep your yarn from rolling around (these are great options).