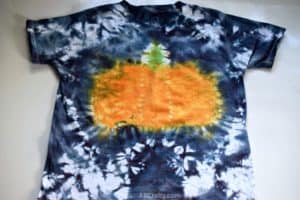
Tie Dye Pumpkin Shirt
Learn how to make a tie dye pumpkin design on a shirt. Celebrate fall or Halloween with this unique pumpkin tie dye design.
Materials
- 1 White Cotton Shirt
- Washable Markers Orange and Green
- 1 Needle and Thread
- Rubber Bands or Zip Ties
- 1 Small Clamp or Clothespin
- 1 Tie Dye Kit or Tie-Dye Dye and Soda Ash
- Water
- 1 pair Rubber Gloves
- Plastic Wrap
- Paper Towels
Equipment
- Bucket or Plastic Bin
Instructions
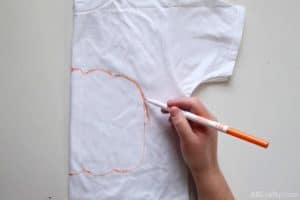
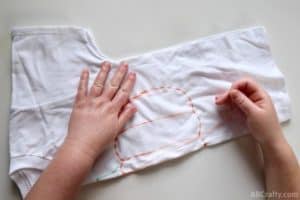
- Fold the shirt in half and draw half of a pumpkin outline using a washable marker.1 White Cotton Shirt, Washable Markers
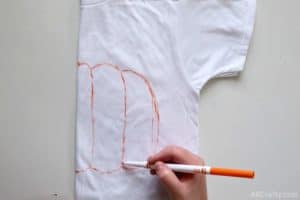
- If you want the pumpkin to have extra details, draw lines connecting the top and bottom.
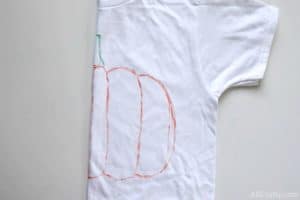
- Use a green washable marker to draw half of a stem at the top.
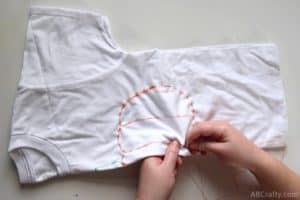
- Use a needle and thread to do a basic running stitch around the outside of the pumpkin.1 Needle and Thread
- Sew along each line you drew in the body of the pumpkin.
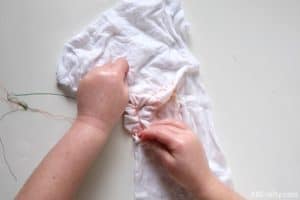
- Soak the shirt in water and squeeze out the excess.Then start with the middle stripes of the pumpkin and gently pull on the thread. This will create folds in the shirt.Water

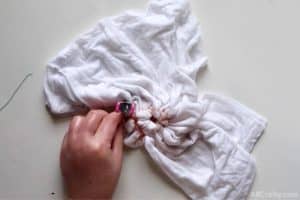
- Tie it off using the ends of the yarn.Repeat the process for the other stripe and the outline of the pumpkin.
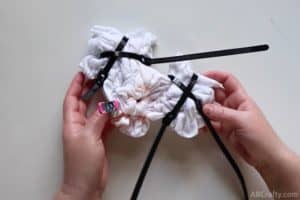
- Fan fold along the stem line and place the clamp along the line.1 Small Clamp or Clothespin
- Crumple, twist, or scrunch the rest of the shirt however you'd like.

- Secure it with rubber bands or zip tiesRubber Bands or Zip Ties
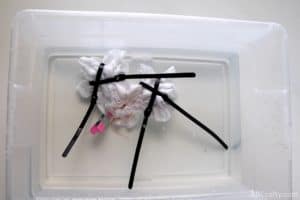
- Soak it in a soda ash mixture for at least 20 minutes.The ratio should be 1 cup soda ash to 1 gallon of water.
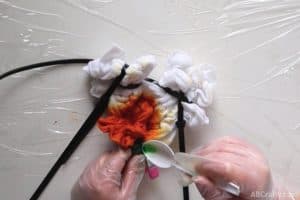
- Put on gloves and prepare the dyes according to the instructions. Mix the yellow and red to make orange. Mix yellow and blue to make green.Cover your area with plastic wrap and add the orange dye to the pumpkin section.1 Tie Dye Kit or Tie-Dye Dye and Soda Ash, Plastic Wrap, 1 pair Rubber Gloves

- Add green dye to the stem.
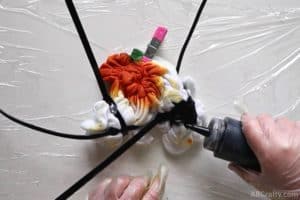
- Add black to the rest of the shirt. Be careful to not get black on the orange or green parts. Use a paper towel to wipe up the black dye.Paper Towels
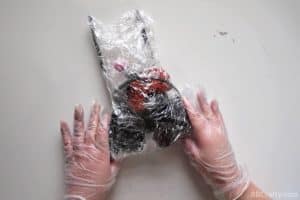
- Wrap it all up in plastic wrap and let it set for at least 6 hours, but I recommend a full 24 hours.
- Rinse it in the sink until the water runs clear. Then wash it in the washing machine with other tie dye clothes. Run it through the dryer and your tie dye pumpkin shirt is ready to wear!