Air Dry Clay Ghost

white ghost with pink bow with the title 'air dry clay ghost'

Make your own spooky-cute Halloween décor with this easy air dry clay ghost tutorial! Perfect for beginners, this step-by-step guide shows you how to sculpt, smooth, and paint a little ghost with a bow. No kiln required—just simple supplies and a love for DIY Halloween crafts!

Table of Contents

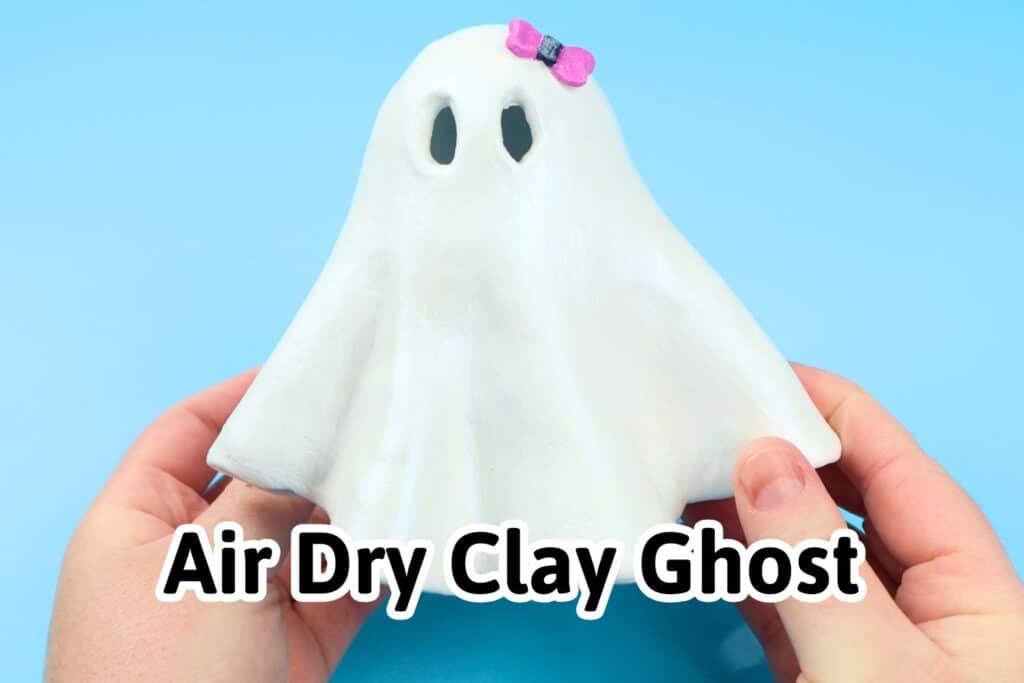
This was my first time using air dry clay and since I made it while it was becoming spooky season, I figured making a little air dry clay ghost would be perfect! Since I’m a beginner myself and I can confirm this is a great beginner air dry clay project and of course, it’s perfect for Halloween!

Note: Some links in this post may contain affiliate links, which means at no cost to you, I may earn a commission.

Get the latest DIY tutorials, reviews, and crafting updates

You'll never be spammed and can unsubscribe at any time

Don’t forget to pin it so you can easily come back to it later!

top photo is the completed ghost with the bottom photo using an acrylic paint pen to color in a bow on the ghost. the title says 'step by step tutorial - how to make an air dry clay ghost, abcrafty.com'

Materials for an Air Dry Clay Ghost

I happened to use an air dry clay kit that comes with pretty much everything you need (this one), but you can also get the materials separately. Below is the full list of what I used:

To make the ghost form, you can use whatever you have on hand, but I happened to use the following:

  • Yoplait Yogurt Container
  • Packing Paper
  • Masking Tape (Amazon)

Video Instructions

Instructions to Make an Air Dry Clay Ghost

Roll the Clay

Whether you’re using a kit like I did (this is the one I used) or separate air dry clay, you’ll want to cut some off and roll it out into a circular shape. I used roughly half of the block and rolled it slightly thicker than a quarter of an inch.

Tip: Don’t roll it too thin or it will more likely crack.

using a wooden rolling pin to roll air dry clay into a circle on the artify pottery mat

Make the Mold

You can make the mold out of whatever you’d like, but I used an empty Yoplait yogurt container and some packing paper. You want a cone shape with a rounded top so for that part, I crumpled the paper and covered it in masking tape to smooth it out. Then I attached the ball to the container using more masking tape.

putting a crumbled ball of paper onto a yoplait yogurt container to make a ghost mold
taping a ball to a yoplait yogurt container

Get the latest DIY tutorials, reviews, and crafting updates

You'll never be spammed and can unsubscribe at any time

Shape the Clay

Drape the clay over the form, trying to keep it as centered as possible. Then go around it and add in the folds.

forming folds into the clay

Once you have the folds, you want to make sure it’s all smooth and there aren’t any bumps or cracks. Use a little bit of water to smooth it all out.

smoothing the folds of the clay with water

Once it’s how you like it, you can make the eyes. I used the wooden needle tool to mark where I wanted them, and then cut deeper and scooped out the clay.

Set this removed clay to the side as you’ll use it to make the bow.

using a wooden needle tool to draw eyes onto the clay ghost

Use a lightly damp brush to smooth out the inside of the eyes.

Get the latest DIY tutorials, reviews, and crafting updates

You'll never be spammed and can unsubscribe at any time

using a brush to paint inside the eyes

Shape the bow by making the main part and then adding a little piece to the middle.

To attach it, you need to score the back of it as well as where you’re going to place it. This means scratching the surface. Then add a little bit of water to each side and press the pieces together. This scoring process is necessary in order for the pieces to stick well together.

using a scraping tool to etch into the air dry clay sculpture
sticking the clay bow to the top of the ghost

Sand and Paint

Now you’ll need to let everything dry. Your packaging will give you the time required, but mine said 2 days.

When it’s completely dry, carefully remove it from the form. Then you’ll want to sand any necessary lumps. I also wanted to shave some off parts of the bottom to help it sit more upright.

Dip the sanding block into water so that you’re wet sanding (you don’t want to inhale the particles!)

using a sanding black to sand the edges of the clay sculpture

Once it’s how you like it, it’s time to paint it! I covered mine completely in white paint and then used a dry brush (from this set) to add shimmer powder so it had a more ethereal look (this is what I used).

using a dry brush to brush shimmer powder onto the ghost

Next, paint the bow. I had just received a set of acrylic paint markers so I used those (this set) and it made painting the small details so much easier so I’m officially a paint pen convert!

My favorite color combo is pink and black so that’s what I went with – pink for the outside and black for the middle.

Get the latest DIY tutorials, reviews, and crafting updates

You'll never be spammed and can unsubscribe at any time

using a black acrylic paint pen to color in the middle of the clay bow

To seal in all of the shimmer so it doesn’t go everywhere, you’ll want to coat it in clay varnish.

Then all that’s left to do is add in some fairy lights like these. You can even glue them to the inside, but I opted to just shove them under the ghost.

putting fairy lights under the air dry clay sculpture

And now you have a completed air dry clay ghost, perfect for Halloween!

If you make your own, I’d love to see it! Either head over to my community page on YouTube or tag me on instagram @ab.crafty!

Get the latest DIY tutorials, reviews, and crafting updates

You'll never be spammed and can unsubscribe at any time

holding the finished air dry clay ghost with a bow

And of course we have to see what it looks like in the dark and glowing!

finished air dry clay ghost lit up on a black background

More Halloween and Clay Crafts to Try

Get the latest DIY tutorials, reviews, and crafting updates

You'll never be spammed and can unsubscribe at any time

holding the finished air dry clay ghost with a bow

Air Dry Clay Ghost

Make your own spooky-cute Halloween décor with this easy air dry clay ghost tutorial! Perfect for beginners, this step-by-step guide shows you how to sculpt, smooth, and paint a little ghost with a bow. No kiln required—just simple supplies and a love for DIY Halloween crafts!
Yield 1 Ghost
Project Time 1 hour
Drying Time 2 days
Total Time 2 days 1 hour

Materials
  

  • 1 Air Dry Clay Kit
  • Shimmer Powder
  • Acrylic Paint Markers
  • Fairy Lights

Ghost Form

  • Yogurt Container
  • Packing Paper
  • Masking Tape

Equipment

  • Rolling Pin
  • Sanding Block

Instructions
 

  • Cut half the block, roll into a circle ~¼" thick.
    using a wooden rolling pin to roll air dry clay into a circle on the artify pottery mat
  • Use a yogurt cup with a taped paper ball for the ghost form.Yogurt Container
    taping a ball to a yoplait yogurt container
  • Drape clay over mold, add folds, smooth with water, and cut out eyes. Save extra clay for bow.
    using a wooden needle tool to draw eyes onto the clay ghost
  • Shape bow, score and wet both surfaces, then attach securely.
    sticking the clay bow to the top of the ghost
  • Let dry (2–3 days), carefully remove mold, then wet sand smooth.
    using a sanding black to sand the edges of the clay sculpture
  • Paint ghost white, add shimmer, color bow, and seal with varnish.Shimmer Powder
    using a black acrylic paint pen to color in the middle of the clay bow
  • Place fairy lights inside or underneath for a glowing effect.
    finished air dry clay ghost lit up on a black background

Video

Keyword Air Dry Clay, Clay, Ghost, Halloween

More Craft Projects and Ideas

Leave a Comment

Your email address will not be published. Required fields are marked *

Rating