Ice Candles – How to Make Candles with Ice

Blue and white candles with holes in them making them look like swiss cheese. The title reads "Ice Candles, easy diy candles"

Learn how to make ice candles. This easy candle making technique uses ice to create a fun design in the wax. When I first learned how to make candles, this is the first one I learned how to make. Therefore it’s a perfect first one to make if you’re completely new to candle making.

Table of Contents

Get the latest DIY tutorials, reviews, and crafting updates

You'll never be spammed and can unsubscribe at any time

Why I Originally Made Ice Candles

As mentioned, these were the very first DIY candles I ever learned how to make. I unfortunately can’t remember where I learned to make them, but I do remember why I made them. In case you haven’t read my about me page, I developed my love of crafts in Girl Scouts. One of the events our troop attended was the Camporee.

If you’ve never attended a Camporee, it’s a camp outing for Girl Scouts (though I think Boy Scouts have their version as well). My favorite event was the Camporee SWAP. SWAPS stands for Special Whatchamacallits Affectionately Pinned Somewhere. (I have to be honest, I had to look up what SWAP stands for, but I’m proud I still remembered the name itself). It was an easy lesson in how to make friends.

During the Girl Scout SWAP we exchanged little handmade items. Even though “pinned” is in the acronym, very few of the items had pins attached to them. A common item was friendship bracelets, but one year I made the ice candles or how I like to call them, Swiss cheese candles.

How I Made My First Candles

The full ice candle making instructions are below, but if you want to make a bunch of mini candles as gifts, read on.

Since I first made these DIY candles as part of a gift giving event, I used tiny dixie cups and crushed ice cubes. I also added glitter and food coloring to the wax after it melted and sprinkled more glitter on the top after pouring the wax.

Since I originally made these ice candles as a child, I can personally attest to how great of a kids craft these are. You can even do them as part of a party activity that the kids can then take home. Naturally just be careful of the hot wax. The advantage of these ice candles is since they’re made using ice they’re incredibly quick to set. If you’ve never made homemade candles before, this is a major benefit since normally candle making is a long process of cooling and repeated pouring. These specific candles, however, are a nice one and done.

Note: Some links in this post may contain affiliate links, which means at no cost to you, I may earn a commission.

Don’t forget to pin it to save for later!

Photo of blue and white ice candles on top and holding a blue handmade candle on bottom with the title "ice candles, easy diy candles, abcrafty.com" in the middle

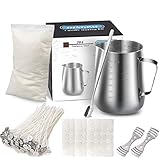
Supplies to Make Ice Candles

You can decide whether make soy candles, paraffin, or beeswax ones. The advantage to making soy candles is the melted wax can be used as a lotion or massage oil. Fun fact – if you’ve ever bought a massage candle, it’s simply a soy candle. All soy candles can be massage candles.

The only difference in terms of materials in making a soy candle versus making a paraffin or beeswax candle is the type of wax you use. And all can be used for this project.

Instead of getting the candle making supplies separately you can instead get a candle making kit (such as this one) that will have the wax, wicks, candle molds, scents, and candle dyes included.

Candle Making Video Instructions

Steps for How to Make Ice Candles

Pour the soy wax flakes or beeswax pellets into a paper cup or microwave safe dish. If you’re making a paraffin candle, it’s typically sold as blocks so you’ll instead need to cut off some chunks.

Holding a cup of soy wax flakes

Melt the candle wax by placing it in the microwave for 10 second increments. Stir in between with a popsicle stick to make sure you don’t burn the wax.

After it has melted, stir in a few drops of essential oils. If you would like your ice candle to be colored or have glitter, this would also be the time to add those in.

Note: When coloring wax, you can’t use food dye as those are typically water based and won’t mix with the wax. Therefore you need to use dyes specific to candle making. Typically they’re sold as little pellets or blocks that you can scrape a little bit off of and mix into your melted wax.

Pouring essential oils into melted soy wax that's in a paper cup with a popsicle stick in it

Dip the bottom metal part of the candle wick into the melted wax.

Get the latest DIY tutorials, reviews, and crafting updates

You'll never be spammed and can unsubscribe at any time

Dipping the metal part of the bottom of a waxed wick into melted wax inside of a paper cup with a popsicle stick in it

Place the freshly dipped wick onto the bottom of a new wax lined paper cup. This cup will be your candle mold.

Make sure the wick is centered. Hold it in place until the wax has cooled and the candle wick can stand up on its own.

Sticking a waxed wick to the bottom of a paper cup with another paper cup full of melted wax next to it with a popsicle stick in it

Fill the cup with ice, making sure to distribute evenly around the wick. You may need to hold the wick in place in order to keep it centered within the cup.

Dropping ice into a paper cup with a candle wick in the middle

Pour the melted wax over the ice.

If you’re doing this craft with kids, make sure they’re being very careful. Just in case, it’s a good idea to have them wear gloves during this part just in case any wax splashes.

Pouring melted wax out of a paper cup on top of ice cubes with a candle wick sticking out of the middle of a paper cup.

You can choose whether or not you want the top of your homemade candle to be smooth. I like them to have the holes on top as well. If you do too, place additional ice cubes on top of the wax.

For added sparkle, sprinkle glitter on top of the melted candle wax.

Placing an ice cube on top of melted wax with ice cubes throughout, while holding a candle wick in the middle of the wax

Let the wax set and ice melt.

White soy wax in a paper cup cooling around ice with a candle wick in the middle.

Once the ice has melted pour the water out.

Then carefully peel the side of the paper cup and remove the candle.

Pulling a white soy candle out of a wax paper cup

Shake off any excess wax and admire your newly made ice candle!

Get the latest DIY tutorials, reviews, and crafting updates

You'll never be spammed and can unsubscribe at any time

Holding a handmade soy candle with holes in it

Here is another one I made using blue candle dye and blue glitter mixed throughout. I wish I had taken my own advice on this one and sprinkled additional glitter over the top to really make it sparkle!

These really are great for gift giving and make fantastic Mother’s Day gifts.

More Easy Crafts that are Also Great for Kids

Get the latest DIY tutorials, reviews, and crafting updates

You'll never be spammed and can unsubscribe at any time

Photo of blue and white ice candles on top and holding a blue handmade candle on bottom with the title "ice candles, easy diy candles, abcrafty.com" in the middle

Ice Candles – How to Make Candles with Ice

Learn how to make ice candles. This easy candle making technique uses ice to create a fun design in the wax. When I first learned how to make candles, this is the first one I learned how to make. Therefore it’s a perfect first one to make if you’re completely new to candle making.
Yield 1 Candle
Project Time 10 minutes
Total Time 10 minutes

Materials
  

  • Candle Wax
  • 2 Paper Cups (wax lined)
  • 1 Candle Wick
  • Candle Fragrance (essential oil)
  • Candle Dye
  • Ice
  • Glitter (optional)

Equipment

  • Microwave

Instructions
 

  • Pour the soy wax flakes or beeswax pellets into a paper cup or microwave safe dish.
    Holding a cup of soy wax flakes
  • Melt the candle wax by placing it in the microwave for 10 second increments. Stir in between with a popsicle stick to make sure you don’t burn the wax.
    After it has melted, stir in a few drops of essential oils. If you would like your ice candle to be colored or have glitter, this would also be the time to add those in.
    Pouring essential oils into melted soy wax that's in a paper cup with a popsicle stick in it
  • Dip the bottom metal part of the candle wick into the melted wax.
    Dipping the metal part of the bottom of a waxed wick into melted wax inside of a paper cup with a popsicle stick in it
  • Place the freshly dipped wick onto the bottom of a new wax lined paper cup. This cup will be your candle mold.
    Make sure the wick is centered. Hold it in place until the wax has cooled and the candle wick can stand up on its own.
    Sticking a waxed wick to the bottom of a paper cup with another paper cup full of melted wax next to it with a popsicle stick in it
  • Fill the cup with ice, making sure to distribute evenly around the wick. You may need to hold the wick in place in order to keep it centered within the cup.
    Dropping ice into a paper cup with a candle wick in the middle
  • Pour the melted wax over the ice.
    Pouring melted wax out of a paper cup on top of ice cubes with a candle wick sticking out of the middle of a paper cup.
  • You can choose whether or not you want the top of your homemade candle to be smooth. I like them to have the holes on top as well. If you do too, place additional ice cubes on top of the wax.
    Placing an ice cube on top of melted wax with ice cubes throughout, while holding a candle wick in the middle of the wax
  • Let the wax set and ice melt.
    White soy wax in a paper cup cooling around ice with a candle wick in the middle.
  • Once the ice has melted pour the water out.
    Then carefully peel the side of the paper cup and remove the candle.
    Pulling a white soy candle out of a wax paper cup
  • Shake off any excess wax and admire your newly made ice candle!
    Holding a handmade soy candle with holes in it
Keyword Beeswax, Candle, Candle Making, Glitter, Ice, Paraffin Wax, Soy Wax
Daniela Kretchmer

Daniela Kretchmer

Daniela is a lifelong crafter who loves to share her passion for crafting. Through classes or learning on her own, she likes to say she'll do pretty much any craft aside from scrapbooking. Her current personal obsessions include garden crafts, felting, and spinning yarn.

More Craft Projects and Ideas

Leave a Comment

Your email address will not be published. Required fields are marked *

Rating