DIY Taba Squishy

holding a white hamster taba squishy with pink ears and fit and the title saying "diy taba squishy

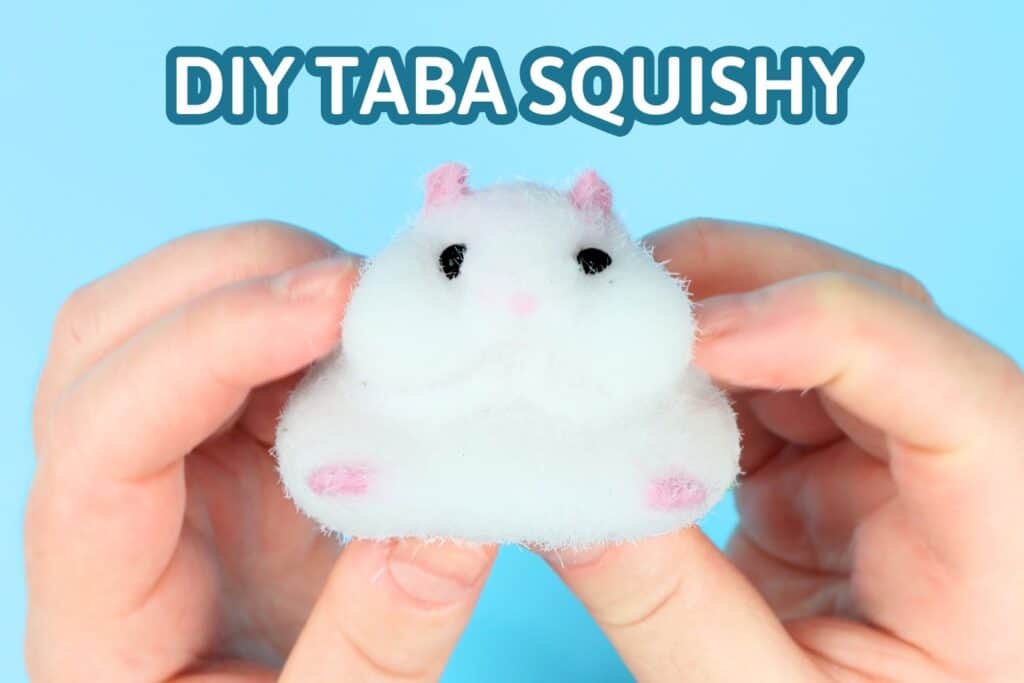
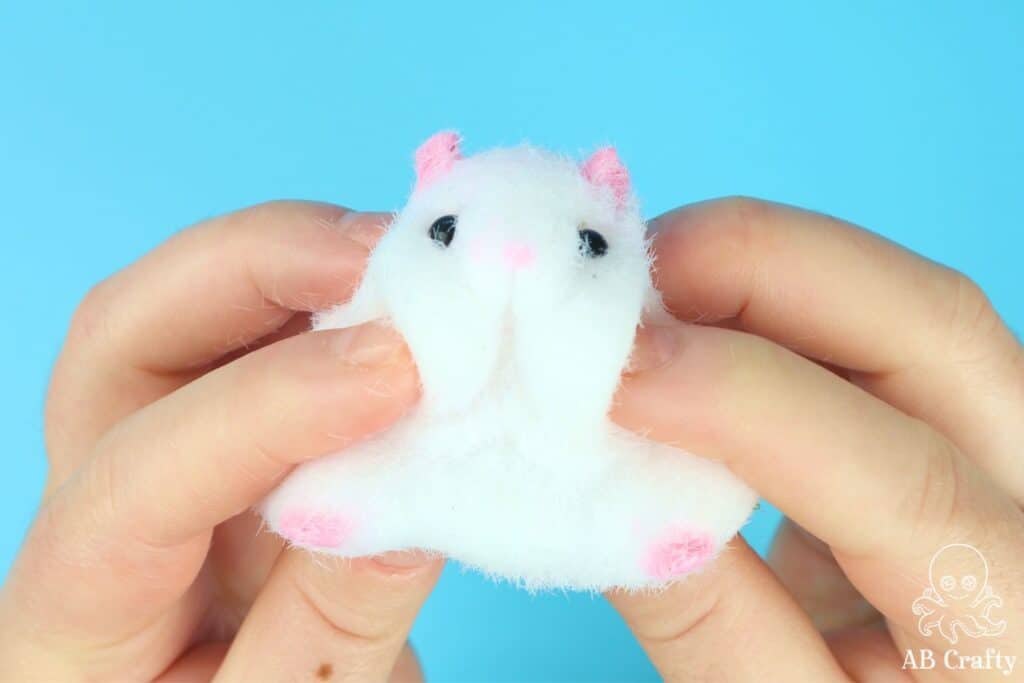
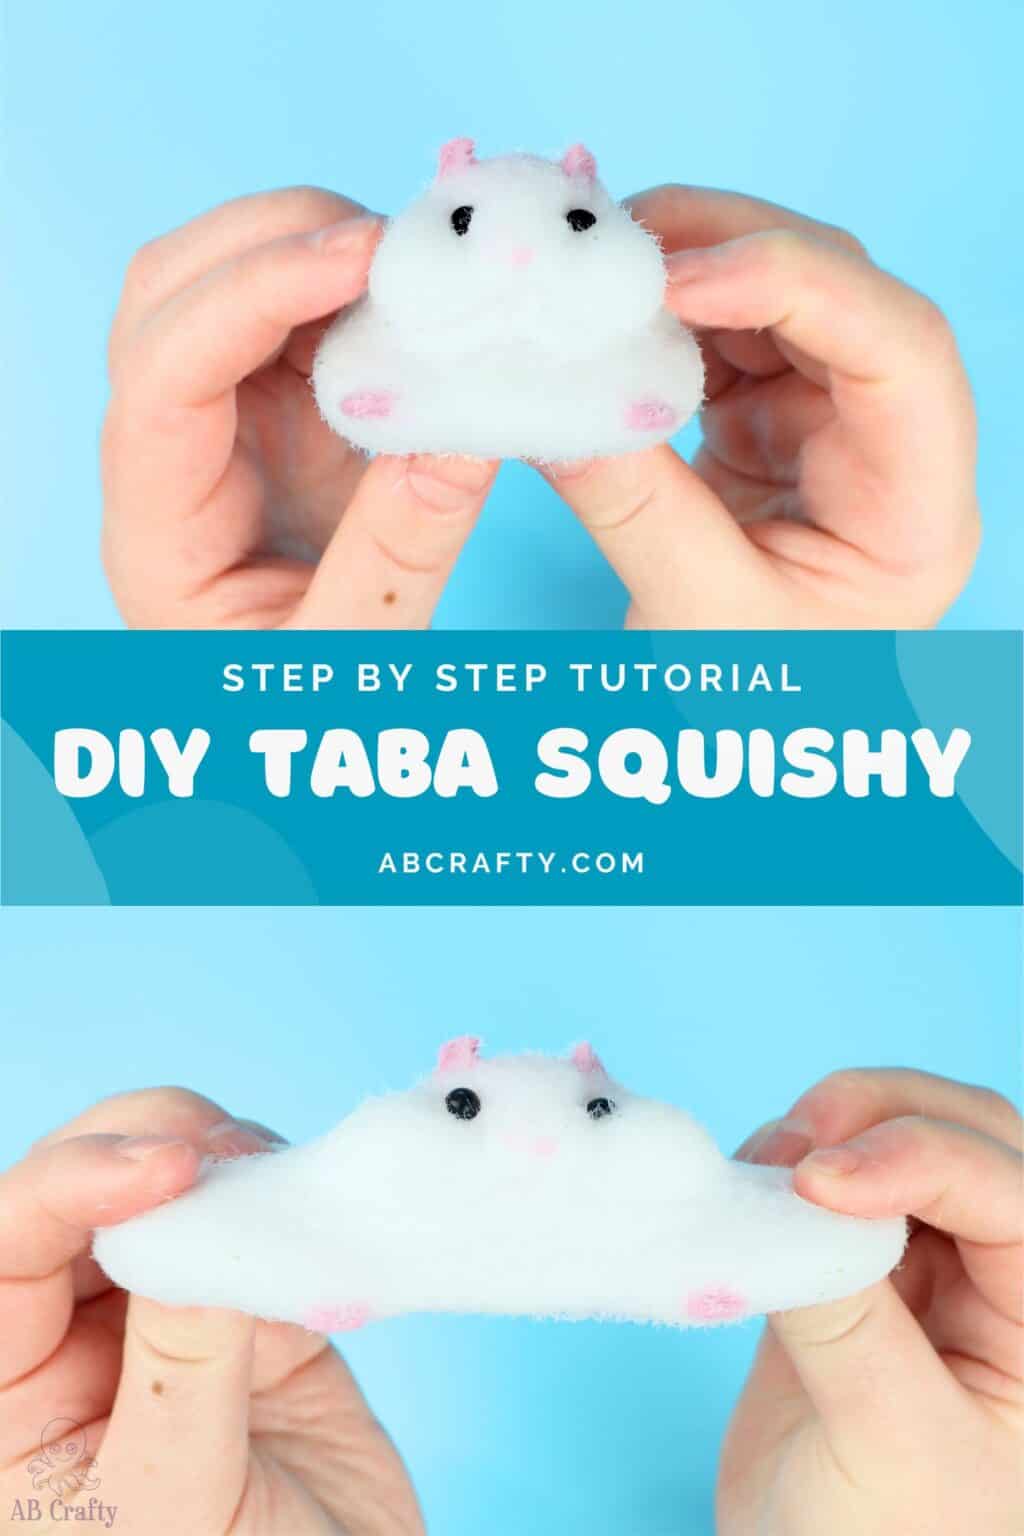
Want to make your own Taba Squishy? These easy to follow instructions show you how to make the real thing so you can customize them how you’d like!

Note: Some links in this post may contain affiliate links, which means at no cost to you, I may earn a commission.

Table of Contents

Ever wondered how to make your own TABA Squishy? You’re in the right place! I myself was surprised to learn you can actually make them at home – and not just a squishy-like object, but a TRUE Taba Squishy!

In this tutorial, I’ll show you exactly how I made my own hamster squishy using a DIY Taba squishy making kit from Amazon. The kit I used came with multiple molds, colors, and accessories, making it one of the best options for beginners.

I’ll walk you step-by-step through the process of mixing, coloring, and flocking your squishy, plus share some tips I learned along the way. And if you’d rather skip the DIY and get the real thing, you can grab an official Taba squishy from their store with 10% off using code ABCRAFTY.

Get the latest DIY tutorials, reviews, and crafting updates

You'll never be spammed and can unsubscribe at any time

squishing the cheeks of a dhamster taba squishy

What is a Taba Squishy?

Taba squishies are soft, squeezable and stretchable toys, often in cute shapes such as the iconic hamster squishy, bunnies, paws, and even in the shape of food. They’re made of silicone with a velvety flocked surface.

A DIY taba squishy kit lets you create your own custom version at home.

Taba Squishy Coupon Code

If you want to skip making one yourself, you can get a Taba Squishy from their store for 10% off with code ABCRAFTY!

Don’t forget to pin it so you can easily come back to it later!

top image shows hands holding a white hamster taba squishy and the bottom shows stretching it out. the title says "step by step tutorial, diy taba squishy, abcrafty.com"

Materials for Taba Squishies

The best and easiest way to make one is to use a DIY Taba Squishy Kit as it will come with everything you need. This is the one I used, but it apparently doesn’t exist anymore so here is a list of other kits that also have the hamster mold. You can also search Amazon for other kits (just make sure it comes with silicone pigments).

Taba Squishy Kit Options

  • UGRASEA: This one comes with 4 different molds (hamster, paw, kitten, and puppy)
  • Heckles: This is has the same molds as the kit I used (hamster, bunny, and paw)
  • FunShowcase: This one has 2 hamster molds (one is the one I used and the other is a hamster laying on its stomach)

Individual Materials

  • 2 Part Liquid Silicone (you can find this lots of places, such as Amazon and AliExpress)
  • Silicone Mold
  • Silicone Pigment (Amazon)
  • Flocking Powder (Amazon)
  • Accessories, such as eyes
  • Vaseline
  • Pipette (optional, but can make small details easier)
  • Mixing Cups
  • Paint Brush
  • Electric Mixer (optional – this is similar to the one I have)
  • Gloves

Video Instructions

Instructions to Make a Taba Squishy

Prep the Mold

Use a brush to wipe vaseline on the inside of the mold. Make sure to get it thoroughly coated – otherwise you’ll have trouble getting the squishy out. This means don’t forget about all the little details such as the ears and feet.

You can then set the mold to the side.

brushing vaseline into a silicone hamster taba squishy mold

Mix the Silicone

The most important thing to make a Taba Squishy is the liquid silicone. It will come in two bottles, part A and part B. Your kit will come with it (this is similar to my kit) or you can also get it separately.

liquid silicone in part a and part b

Measure each part into mixing cups. It might not be clear how much to use, but I filled the measuring cups that came with my kit and that was the perfect amount for the hamster mold.

Tip: It’s a good idea to put gloves on at this point!

white liquid silicone in tow small measuring cups

Pour both parts into one cup and be sure to scrape the sides well so that you get all of it. If the ratios aren’t correct it will have issues setting.

Then you can use a popsicle stick or an electric mixer to mix it for ~5 minutes. After doing a few resin projects, I learned very quickly I wasn’t a fan of mixing it so I upgraded to an electric mixer and haven’t looked back. I HIGHLY recommend getting one (this is similar to mine).

using an electric resin mixer to mix silicone in a small measuring cup while wearing nitrile gloves

Get the latest DIY tutorials, reviews, and crafting updates

You'll never be spammed and can unsubscribe at any time

Add the Color

In theory this part is optional, but now is your chance to add color to your Taba squishy. I wanted to go with a classic white hamster look so I first dyed the entire amount of silicone white.

If you want to do multiple colors, first separate the silicone into different cups to dye them separately.

Tip: A little goes a long way with silicone pigments! Also, too much can affect the curing time. Remember, you can always add more but you can’t take remove it.

using a popsicle stick to scoop out some white silicone pigment

After that’s mixed, I transferred a small amount of white into a separate cup and added in a tiny amount of red to make pink.

(The reason I kept it all white to start was because in order to make pink I needed a white base anyways).

putting a popsicle stick into some liquid silicone that has been dyed pink with silicone pigment

Get the latest DIY tutorials, reviews, and crafting updates

You'll never be spammed and can unsubscribe at any time

Fill the Mold

Start with the intricate details and use a pipette to scoop some of the accent color.

Note that it will likely take a few tries to get the silicone into the pipette because of how thick it is.

In my case for the hamster, I added the pink to its ears and feet. I completely forgot about its front paws, but thankfully you don’t notice it!

Tip: Use a q-tip to wipe up any spills and clean up the mold. Remember, anywhere the accent color is will show up in the final squishy.

using a pipette to insert pink silicone into a taba suishy hamster mold

After you’ve completed your accents, carefully pour in the main color to fill the mold. Then you can use a popsicle stick to pop any bubbles at the top.

using a popsicle stick to pop bubbles on a mold filled with white silicone

Let it Cure

Let the squishy cure. My instructions said 2–3 hours, but I let mine sit overnight just to be safe.

This is what it looked like after 3 hours and it was the same consistency in the morning. It’s sticky, but springs back when I pull my finger away.

Then carefully remove it from the mold. It can help to turn the mold inside out. Just work slowly and carefully and it should all come out nicely.

finger showing how sticky the bottom of a mold filled with silicone is

Add Accessories and Flocking Powder

This is the time to add any accessories such as the eyes or if its going to hold something (e.g. my kit came with a little cheese slice). Do this before flocking powder, otherwise they won’t stick well (oops to me!).

Shake the flocking powder over the squishy and roll it around until its fully coated. This gives it that signature soft, fuzzy finish.

pouring white flocking powder on a DIY taba squishy hamster

Now your taba squishy is ready to squish and stretch! Personally I love smooshing its cheeks in – so stinkin’ cute!

If you make your own, I’d love to see it! Tag me on Instagram @ab.crafty or share it in my community section on my Youtube channel.

And don’t forget, if you want the real thing you can use code ABCRAFTY to get 10% off on the Taba site.

Get the latest DIY tutorials, reviews, and crafting updates

You'll never be spammed and can unsubscribe at any time

squishing the cheeks of a dhamster taba squishy
holding a diy taba squishy in the shape of a white hamster

Frequently Asked Questions

What is a Taba squishy made of?

Taba squishies are made from silicone. The DIY kits use a two part liquid silicone that you mix and pour into molds. Once cured, you can coat them with flocking powder to give them the signature soft and fuzzy texture.

How long does it take to make a Taba squishy?

Depending on how detailed you make it, filling the mold can take 10 min to probably 30 min. Then it takes 2-3 hours to cure at minimum, but I like to leave it overnight just to be on the safe side.

How do I get the squishy out of the mold?

Vaseline will be your best friend here. The first thing is to make sure you thoroughly coat the mold with vaseline as this will work as a mold release. Then when it comes time to demold your squishy, work carefully and slowly, peeling it away from the mold section by section. It can even help to flip the mold inside out.

What shapes can I make for my own squishies?

If there’s a silicone mold for the shape you want, you can make it! Any mold will work – just make sure you don’t use that mold for food afterwards.

More Crafts to Try

Get the latest DIY tutorials, reviews, and crafting updates

You'll never be spammed and can unsubscribe at any time

holding a diy taba squishy in the shape of a white hamster

DIY Taba Squishy Hamster

Ever wondered how to make your own TABA Squishy? You’re in the right place! I myself was surprised to learn you can actually make them at home – and not just a squishy-like object, but a TRUE Taba Squishy!
Yield 1 Taba Squishy
Project Time 20 minutes
Curing Time 3 hours
Total Time 3 hours 20 minutes

Materials
  

  • Taba Squishy Kit

Equipment

  • Electric Mixer

Instructions
 

  • Use a brush to wipe the inside of the mold with vaseline
    Taba Squishy Kit
    brushing vaseline into a silicone hamster taba squishy mold
  • Measure equal parts of A and B in the provided cups.
    white liquid silicone in tow small measuring cups
  • Pour into a larger container and mix thoroughly (hand stir or use an electric mixer - this is the one I have)
    using an electric resin mixer to mix silicone in a small measuring cup while wearing nitrile gloves
  • Mix pigments into the silicone. Separate a small amount for accent colors.
    using a popsicle stick to scoop out some white silicone pigment
  • Use a pipette or Q-tip to place accent colors in the ears, nose, and feet.
    using a pipette to insert pink silicone into a taba suishy hamster mold
  • Pour in the main silicone color, scraping the container to get every bit. Pop the bubbles on top.
    using a popsicle stick to pop bubbles on a mold filled with white silicone
  • Let it cure for 2-3 hours. Gently peel back the mold and turn it inside out to release the squishy.
    finger showing how sticky the bottom of a mold filled with silicone is
  • Add accessories, such as eyes. Then cover in flocking powder.
    pouring white flocking powder on a DIY taba squishy hamster
  • Your Taba hamster squishy is ready to squish!
    squishing the cheeks of a dhamster taba squishy

Video

Keyword Animal, Cute, Kawaii, Squishies, Squishy

More Craft Projects and Ideas

Leave a Comment

Your email address will not be published. Required fields are marked *

Rating