DIY Chocolate Bath Bombs

Finished DIY Chocolate Bath Bomb and Chocolate Bar Bath Bomb

Learn how to make a chocolate bath bomb with this easy step by step tutorial. It’ll be like you’re bathing in hot chocolate – so it’s really like a hot chocolate bath bomb.

Table of Contents

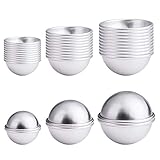
The great part about homemade bath bombs is they don’t require very many ingredients to make. Even so, this recipe requires fewer since it doesn’t use essential oils or dyes. Instead, both the scent and color come purely from the cocoa powder. Yes, you’ll use actual chocolate for these homemade bath bombs! And I share a variation to make one that looks like an actual Hershey’s bar using a custom chocolate bar mold.

Having a hot chocolate bath also doesn’t just sound like an amazing dream. In fact, cocoa can actually be good for your skin and help even your complexion (source). And by making your own chocolate mold, it’ll look like you’re dropping real Hershey’s chocolate into the tub!

You’ll want to gather the ingredients listed below to make your homemade chocolate bath bomb.

Note: Some links in this post may contain affiliate links, which means at no cost to you, I may earn a commission.

Materials for DIY Chocolate Bath Bombs

Video Instructions to Make Chocolate Bath Bombs

Steps to Make Chocolate Bath Bombs

Combine the baking soda, citric acid, corn starch, and coca powder. The cocoa powder should be added for sent and color so the amount you use is up to you.

Starting to mix ingredients

Next, gradually add small amounts of water and mix it in until the consistency feels like wet sand.

You’ll see when you start adding water that the mixture will begin to fizz – you’ve ultimately started the bath bomb fizzing! Therefore don’t add too much water, otherwise you will use up all of your bath bomb fizz.

Tip: This is where the spray bottle comes in as it will make it easier to not add too much moisture.

Adding water to make the mixture feel like wet sand

Once your mixture is ready, you can start molding your bath bombs.

If you’ve never used a bath bomb mold, it’s easy! Fill the two halves of the bath bomb mold or plastic fillable ornament and press them together.

Tip: Filling the molds can actually work to your advantage. After you press the halves together, you can wipe away the extra.

Filling the bath bomb molds with chocolate mixture

Lastly, carefully remove the molds and leave your newly created bath bombs to dry for at least 24 hours.

Removing chocolate bath bomb from mold

How to Make the Bath Bombs Look Like Chocolate Bars

In order to make the chocolate bar bath bomb, use a chocolate mold and do a similar process as before by pressing the moistened bath bomb mixture into the mold.

Note:  I made this Hershey’s chocolate bar mold when I made DIY chocolate chalk. But the summary is I used an actual Hershey’s bar and some mold putty to create the mold.

Pressing mixture into chocolate bar mold

Finally, very carefully, flip the chocolate bar mold over, pushing on the back lightly to release the bath bomb.

Finished chocolate bar bath bomb

Frequently Asked Questions

What do I do if the bath bomb breaks?

The great thing about bath bombs is the mixture can be re-used so if your bath bomb breaks while making it, simply crumble it up and try again. Keep in mind, you may need to add a bit more water to make it like wet sand again.

What if the mixture doesn’t stay together?

This probably means your mixture is too dry. To fix this, try gradually adding a little more water until your homemade bath bomb stays together.

If video is more your thing, you can also watch the full chocolate bath bomb tutorial here:

What's the best way to use them?

I put together this guide on how to use a bath bomb that has some great tips!

They can also be part of a 30 day self-improvement challenge as a way to pamper yourself or even as part of a spa date night from this list of alphabet dating ideas! But of course they’re perfect for your self care routine.

More Chocolate Crafts and Tasty Creations to Make

And if you’re interested in making other types of bath bombs, take a look at the Pokemon Bath Bomb. Or for another chocolate bar project, try making chocolate sidewalk chocolate.

Then for more bath items that look like food, but aren’t edible, try making these easy popsicle soaps.

Or if you want to actually eat some chocolate, try making some s’mores brownies.

Titled DIY Chocolate Bath Bombs

DIY Chocolate Bath Bombs

Make your own chocolate bath bombs and turn your bath into hot chocolate with this tutorial, including how to make a DIY bath bomb look like a Hershey's bar.
Yield 4 Bath Bombs
Prep Time 5 minutes
Project Time 15 minutes
Total Time 20 minutes

Materials
  

  • 1 Cup Baking Soda
  • ½ Cup Corn Starch
  • ½ Cup Citric Acid
  • Cocoa Powder for color/scent
  • Water

Equipment

  • Mixing bowl
  • Plastic fillable ornament or bath bomb mold
  • Chocolate mold

Instructions
 

For the round bath bomb

  • Combine baking soda, citric acid, corn starch, and cocoa powder. The cocoa powder should be added for scent/color so the amount is up to you.
    Starting to mix ingredients
  • Gradually add water until the consistency resembles wet sand. Be careful not to add too much water at a time. I recommend a teaspoon at a time, or even using a spray bottle. Too much water will cause the mixture to fizz too early.
    Adding water to make the mixture feel like wet sand
  • Fill both sides of a plastic fillable ornament or bath bomb mold and press both halves together.
    Filling the bath bomb molds with chocolate mixture
  • Carefully remove from the mold and set to dry for 24 hours
    Removing chocolate bath bomb from mold

For the Hershey's bar bath bomb

  • Follow steps for the round bath bomb, but instead of filling the ornament, press the mixture into the Hershey's bar mold
    Pressing mixture into chocolate bar mold

Video

Keyword Bath, Bath Bombs, Chocolate, DIY, DIY Bath Bomb, Hershey's, How to make a bath bomb, Lush, Spa
Picture of Daniela Kretchmer

Daniela Kretchmer

Daniela is a lifelong crafter who loves to share her passion for crafting. Through classes or learning on her own, she likes to say she'll do pretty much any craft aside from scrapbooking. Her current personal obsessions include garden crafts, felting, and spinning yarn.

More Craft Projects and Ideas

Leave a Comment

Your email address will not be published. Required fields are marked *

Rating