DIY Rainbow Highlighter: How to Upcycle Old Eyeshadow

rainbow makeup on the cheek of AB Crafty founder, Daniela with a homemade rainbow highlighter next to her

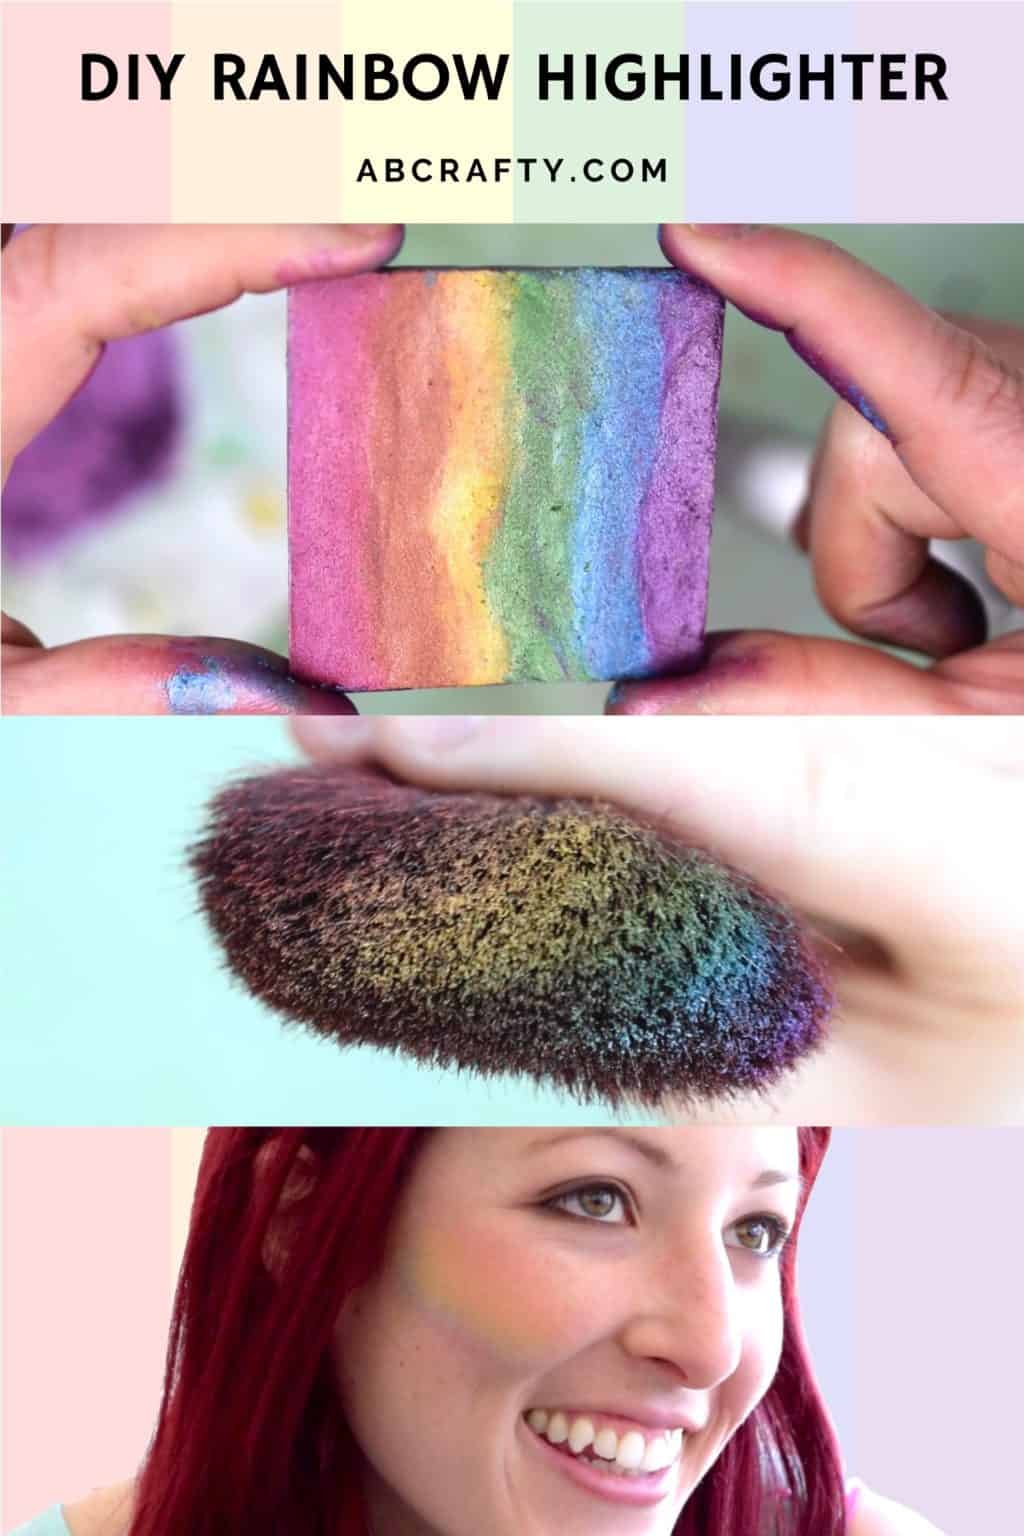
Pride month is all about color, and nothing makes a statement like a custom rainbow highlighter. After experimenting with different shimmer ratios, I’ve found that you don’t need to spend $40 on a viral palette to get that perfect prismatic glow. I’ll show you my expert method for upcycling old eyeshadows into a DIY rainbow highlighter that actually stays vibrant on your skin, not just in the tin.

Table of Contents

Note: Some links in this post may contain affiliate links, which means at no cost to you, I may earn a commission.

multiple photos including holding a finished rainbow highlighter, a makeup brush with rainbow makeup on it, and daniela, ab crafty founder with rainbow makeup on her cheekbone with red hair

The Perfect DIY Dupe for Viral Rainbow Highlighters

The original rainbow highlighter trend took the beauty world by storm because of its unique, prismatic ‘unicorn’ glow. However, finding a high-quality version that isn’t overpriced can be a challenge.

By making your own “dupe” at home, you have total control over the size, pigment density, and shimmer level. I’ve found that many store-bought versions are either too small or chalky or the colors mix together before they even hit your brush. This DIY method ensures the stripes stay distinct and vibrant, giving you that “prism” effect for a fraction of the cost.

Why I Love This Rainbow Makeup for Pride

Happy Pride month! Because it’s the first weekend in June, of course that means this week’s craft project be a rainbow craft. And not just any rainbow craft, but a wearable one in the form of rainbow makeup! The best part about this DIY rainbow highlighter is doesn’t just need to be used as a highlighter.

Fun fact, face makeup (eyeshadows, blushes, highlighters, etc) are typically able to be used anywhere on your body. Therefore you can get all sorts of rainbow makeup looks! You can even use each individual color from the DIY highlighter to draw on rainbows or create gorgeous rainbow eyeshadow.

So whether you’re looking to express your inner rainbow unicorn or simply get some new Pride makeup looks, get your rainbow makeup on!

Common DIY Highlighter Issues & Expert Solutions

Problem Likely Cause The Fix
Colors Blend When Brushed On
Too small of a palette
Use a wider palette to create thick, distinct colors
Cracking/Crumbling
Not pressed firmly or powder wasn’t fine enough before adding the rubbing alcohol
Make sure all the powder is broken up into small particles and use a paper towel to firmly press the powder into the tin.
Dull Pigment
Matte shadow or low quality shadow was used
Use high quality, pigmented eyeshadow that already has shimmer
Taking too long to dry
The alcohol ratio
Use at least 91% isopropyl alcohol (ideally 99%). The 70% has more water, making it take forever to dry.
Colors bleeding together in the palette
Too much rubbing alcohol or not a distinct edge
Be sure to only use enough rubbing alcohol to create a paste. This will also allow you to create a distinct “wall” that the next color will press up against. You can also let each stripe sit for about 2 minutes to dry a little before adding the next color.

A note on sanitation: Always sanitize your mixing palette with alcohol first. Since this is going on your face, keeping it sterile is key!

Materials for DIY Rainbow Highlighter

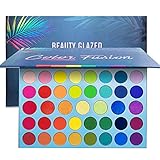
  • Eyeshadows in rainbow colors (shimmer shadows are best if you want the highlight shimmer effect, but you can also use a rainbow eyeshadow palette with matte colors like this one)
  • Empty eyeshadow tin (Use one from an old makeup tin or get a new one) – I recommend a rectangular tin so the colors are more even
  • Knife
  • Mixing palette (this is the one I used or you can use an actual makeup mixing palette that comes with a little knife like this one)
  • Rubbing alcohol – at least 91% (Amazon)

Video Instructions to Make a Rainbow Highlighter

Instructions to Make a Rainbow Highlighter

Prepare Your Rainbow Highlighter Tin

If you’re not using a new makeup tin (like this one), you’ll want to prepare one. I used an eyeshadow palette that I never really used.

Remove the eyeshadow using a knife. If you want to use the colors in your highlighter, try not to mix them as you remove them.

using a knife to remove purple shimmer eyeshadow from an eyeshadow tin

Empty each color into a mixing palette.

(I ended up only using the purples and pinks and tossed the white ones in the end. But when I prepared the palette I kept all the colors).

using a knife to scrape purple eyeshadow out of an eyeshadow palette

Clean the tin using rubbing alcohol and a paper towel. Once it’s clean set it aside for later.

Pro Tip for Distinct Colors!: The wider the tin, the thicker you can make each color, keeping the colors from muddying. The smaller the tin, the more likely the colors will blur together when brushed on.

cleaning an eyeshadow tin with a paper towel

Prepare the Colors for Your Rainbow Highlighter

Next you want to prepare all of the colors. I used these shimmer eyeshadow palettes that were already partially broken, but between the three of them it had all of the rainbow colors.

You can use eyeshadow palettes or even blushes or other highlighters that you have. The key is to use powdered makeup that is highly pigmented. This set is a great option if you don’t already have one.

holding three profusion eyeshadow palettes with multiple colors of shimmer eyeshadow

Scoop out the color from each of the palettes into a mixing palette. In total you want red/pink, orange, yellow, green, blue, and purple.

Since I wasn’t going to use these eyeshadows anymore I ended up combining all of the similar colors into one.

Note: I just used a clean and sterilized paint mixing palette, but I recommend getting one specifically for makeup.

scraping green eyeshadow out of a profusion eyeshadow palette into a mixing palette

By combining colors you can also customize them more to how you like them. For example there wasn’t an orange that I really liked so I added some red to make it more defined.

scraping orange eyeshadow into a mixing palette

Once you have your eyeshadows scooped out, start at one side of the rainbow (either red/pink or purple) as you want to make sure you work in rainbow order.

Use the knife to smash the makeup into a powder. What you’re doing is breaking it back down into a powder so you can rebuild it into a pressed powder.

By the way, this process is also how you can fix any pressed powder makeup!

using a knife to smash pink eyeshadows in a mixing tray

After the makeup is all smashed, add in a few drops of rubbing alcohol.

adding rubbing alcohol to pink eyeshadow in a mixing tray

Mix it up until it forms a paste. Continue to add more rubbing alcohol until it’s easy to work with, but not a runny mess. Think toothpaste consistency.

mixing pink eyeshadow and rubbing alcohol to form a paste

Add the Colors to the Tin

Then spread it into one side of the clean makeup tin.

spreading a wet mixture of pink eyeshadow and rubbing alcohol into a clean eyeshadow tin

Use the knife to shape the edge. You can choose to either have the colors perfectly straight or mix it up for a fun look. I went with slightly wavy.

Tip: Be sure to leave room for all the colors. Since you’re using 6 colors in total, you only want to fill in 1/6th of the palette with the first color.

pushing pink eyeshadow paste with a knife to make it even in an eyeshadow pot

After you’re done with pink/red, move onto orange. Just as before, mash up the makeup and add in rubbing alcohol until it forms a paste.

mixing orange eyeshadow with rubbing alcohol in a mixing tray with other rainbow eyeshadow colors around it

Then again, spread it into the palette. Make sure you press it against the pink so there isn’t a gap in between them.

using a knife to put orange shimmer eyeshadow paste next to pink

Continue mixing up each color and adding them to the palette. Next is yellow.

putting yellow shimmer eyeshadow paste into a tin next to orange

Then green.

adding green shimmer eyeshadow in a row next to yellow in an eyeshadow tin

Then blue.

using a finger to smooth out blue eyeshadow paste

And then purple.

This should also be a lesson in planning. As you can see I didn’t take my own advice and only had a little bit of room left for the purple.

filling in the rest of the eyeshadow tin with purple shimmer eyeshadow

To give it a smooth finish on top and to compress the powder, use a paper towel to carefully press across the palette. This will not only compress the powder so that it doesn’t crumble, but also it helps remove some of the moisture.

Let it dry overnight so that the alcohol evaporates. Then you’re left with a gorgeous rainbow highlighter that would look adorable with some cute pink nail designs!

Get the latest DIY tutorials, reviews, and crafting updates

You'll never be spammed and can unsubscribe at any time

holding a finished diy rainbow highlighter that's in the shape of a square

This is such a fun way to upcycle your makeup into something new!

By the way, did you know there are actually beauty product recycling programs that make it easy to recycle your containers? With all the different plastics it’s difficult to know how to sort it, but those programs make it easy to mail in your empty containers and they do the recycling for you!

How to Apply Rainbow Highlighter

The key to using rainbow highlighter is to get all of the colors onto a brush at once. Therefore it’s recommended to use a thick straight makeup brush. Or you can do what I do and use a big fluffy brush and simply squeeze it so it forms a line.

Then drag the brush from one side of the rainbow palette to the other in one stroke. Make sure you wipe in the same direction of the colors. Otherwise you’ll mix up all the colors.

wiping a big fluffy makeup brush across a diy rainbow highler

When you do it correctly your brush should look like this – a beautiful powdery rainbow!

holding a big fluffy makeup brush with rainbow makeup across the brush

Then wipe the brush across where you want the rainbow, again in one motion.

You can keep the colors subtle or repeat the process for more pigmented color.

wiping rainbow makeup across the forearm with a makeup brush

For the classic rainbow highlighter look, swipe the brush across your cheekbone.

Why use regular blush when your cheeks can quite literally be all the colors of the rainbow! Rainbow blush all the way!

diy rainbow highlighter applied to the cheebone of AB Crafty founder, Daniela for a Pride makeup look

Other Ways to Use a Rainbow Highlighter

Using One Color at a Time: You don’t only have to use your highlighter as a rainbow all the time. Each color can be used on its own. Simply use a smaller brush and use one color at a time.

Making one Color More Pigmented: Use a small brush to add more color to one particular area if that color is not as pigmented as the others. This is what I’m doing in the photo below.

Make Smaller Rainbows: If your palette is bigger than you want the rainbow to be you can paint on each color one at a time. This a great way to make a gorgeous rainbow eyeshadow look. Mini rainbow makeup everywhere!

wrist with rainbow makeup on it while dipping a makeup brush into a diy rainbow highlighter

More Rainbow Crafts to Try

Get the latest DIY tutorials, reviews, and crafting updates

You'll never be spammed and can unsubscribe at any time

multiple photos including holding a finished rainbow highlighter, a makeup brush with rainbow makeup on it, and daniela, ab crafty founder with rainbow makeup on her cheekbone with red hair

DIY Rainbow Highlighter

Get ready for Pride! Learn how to make a vibrant DIY rainbow highlighter by upcycling eyeshadows you already own. Easy, budget-friendly, and perfect for Pride makeup looks.
Yield 1 Rainbow Highlighter
Prep Time 2 minutes
Project Time 15 minutes
Total Time 17 minutes

Materials
  

  • Eyeshadows in rainbow colors For a true highlighter, make sure to use shimmer eyeshadows
  • Makeup tin
  • Rubbing Alcohol

Equipment

  • Knife
  • Paper Towel
  • Mixing Palette

Instructions
 

Prepare the Makeup Tin

  • Remove the eyeshadow from the original palette.
    Eyeshadows in rainbow colors
    using a knife to remove purple shimmer eyeshadow from an eyeshadow tin
  • Empty each color into a mixing palette.
    using a knife to scrape purple eyeshadow out of an eyeshadow palette
  • Clean the tin using rubbing alcohol and a paper towel.
    Rubbing Alcohol, Makeup tin
    cleaning an eyeshadow tin with a paper towel

Create the Rainbow Highlighter

  • Smash the makeup into a powder, one color at a time.
    using a knife to smash pink eyeshadows in a mixing tray
  • Add in a few drops of rubbing alcohol so it forms a paste
    adding rubbing alcohol to pink eyeshadow in a mixing tray
  • Spread it into one side of the clean makeup tin.
    spreading a wet mixture of pink eyeshadow and rubbing alcohol into a clean eyeshadow tin
  • Repeat with each color (orange, then yellow, then green, then blue, then purple)
    mixing orange eyeshadow with rubbing alcohol in a mixing tray with other rainbow eyeshadow colors around it
  • Place a paper towel on top and carefully press down to compress the powder
  • Let it dry overnight so that the alcohol evaporates. Then you're left with a gorgeous rainbow highlighter!
    holding a finished diy rainbow highlighter that's in the shape of a square

Video

Notes

Tip: To prevent blended colors when they're brushed on, use a wider tin to create distinct colors.
Keyword Eyeshadow, Highlighter, Makeup, Pride, Pride Makeup, Pride Month, Rainbow, Rainbow Makeup
Picture of Daniela Kretchmer

Daniela Kretchmer

Daniela is a lifelong crafter who loves to share her passion for crafting. Through classes or learning on her own, she likes to say she'll do pretty much any craft aside from scrapbooking. Her current personal obsessions include garden crafts, felting, and spinning yarn.

More Craft Projects and Ideas

2 thoughts on “DIY Rainbow Highlighter: How to Upcycle Old Eyeshadow”

  1. I realize this is super random but do you recall the brand the rainbow shadow when in? The actual emptied tin in the beginning?

Leave a Comment

Your email address will not be published. Required fields are marked *

Rating