Butter Slime

using a knife to cut a pad of "butter" off the end of the butter slime shaped into a stick of butter and the title reads "butter slime"

Easily make butter slime with this simple recipe. You’ll be stretching, drizzling, and spreading this DIY slime in just a few minutes!

Table of Contents

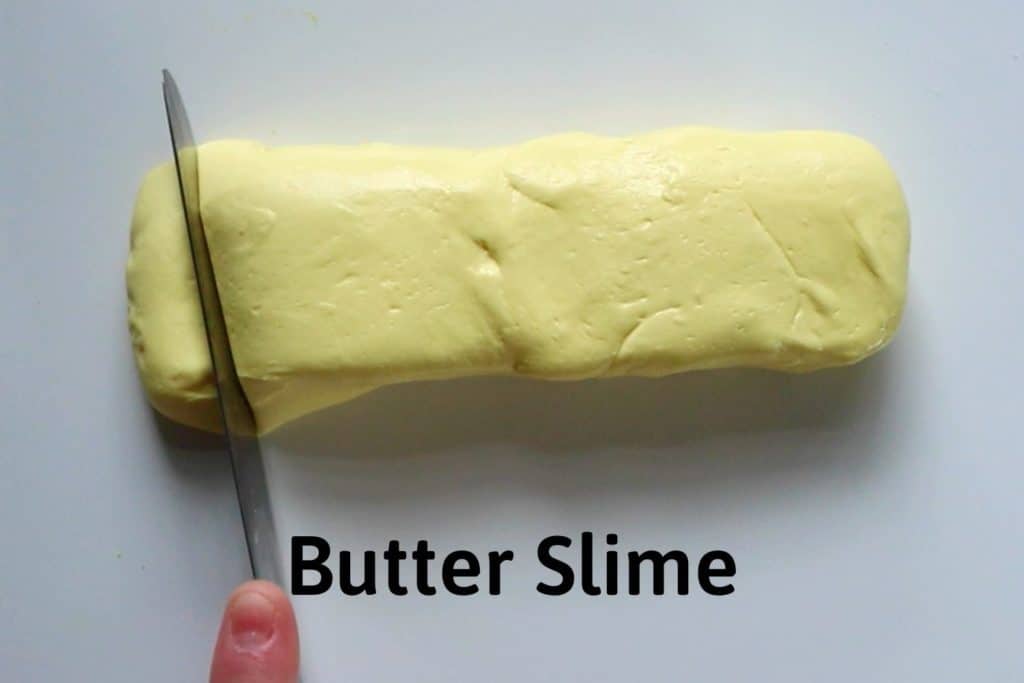
This slime recipe is a unique and fun one to make! It’s soft, pillowy, and spreadable. You can shape it and it will hold the shape, which is how you can get it to look like an actual stick of butter! It’s like a stretchy almost play-doh version of fluffy slime.

I’ve also created a handy set of slime recipe cards to print and cut out. Download them below or from the shop.

image of slime recipe cards

14+ Slime Recipe Cards - Printable PDF

We’re committed to your privacy. AB Crafty uses the information you provide to contact you about relevant content and products. You may unsubscribe from these communications at any time.

Note: Some links in this post may contain affiliate links, which means at no cost to you, I may earn a commission.

Get the latest DIY tutorials, reviews, and crafting updates

You'll never be spammed and can unsubscribe at any time

Don’t forget to pin it so you can easily come back to it later!

top image shows the slime shaped into a stick of butter with a knife cutting into it and the bottom image shows the slime drizzled onto the table. the title reads "step by step tutorial - butter slime, abcrafty.com"

Homemade Butter Slime Recipe

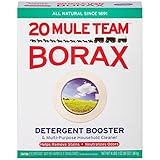
These materials include the water and borax to make your own slime activator. You can also buy a pre-made one. If you do, you can omit the water and borax.

How to Make Butter Slime

Make the Base for the Butter Slime

Pour the glue into a bowl. I ended up using about a quarter cup.

Note: The volume comes from the shaving cream and corn starch so even though it might not look like much now, it will get much bigger!

pouring white glue into a glass bowl

Add several drops of yellow food coloring (a basic set like this one works great!).

Mix it thoroughly.

Tip: Add plenty of food coloring. The shaving cream and corn starch will make the color more pale so be sure to add in enough. I find it’s easier to add the color to the glue than trying to mix it in by hand later.

dropping yellow food coloring into white glue in a glass bowl

Activate the Butter Slime

Next, you’ll want to activate it. You can either make your own slime activator or use store-bought. To make your own, mix a cup of warm water with 1 teaspoon of borax until it’s dissolved. This will be plenty for multiple slimes.

Add the activator to the glue mixture a little at a time. Remember, you’ll only use a small amount of the activator for each slime.

Tip: If you’re not sure how much activator to use, add roughly a teaspoon at a time. You can always add more!

pouring a small amount of slime activator into a bowl with yellow glue

Once it starts pulling away from the bowl, I recommend using your hands to mix it.

It will be a bit sticky at first, but fold it over and stretch it until you smooth out the lumps.

Tip: Place the slime into the bowl and roll it around to pick up all the little slime bits that are left.

lifting yellow glue and activator out of a bowl and stretching it

Get the latest DIY tutorials, reviews, and crafting updates

You'll never be spammed and can unsubscribe at any time

Add the Key Ingredients for Butter Slime

Now that you have your base made, you’ll need to mix in the key ingredients that make butter slime so unique.

Start by adding in some lotion. Again, start with a small amount (~1/2 teaspoon) and mix it in by folding and stretching the slime. This will make it soft and, if you’re using scented lotion, give it a nice smell!

squeezing bath and body works lotion onto yellow slime

The next key ingredient is cornstarch. Measure out roughly a quarter of a cup and mix in a little bit at a time.

mixing cornstarch into the base

Keep mixing in cornstarch until the slime becomes matte, instead of shiny. When you stretch it, it should be slow to stretch and have little ripples that hold their shape, like in the image below.

stretching the yellow slime mixed with cornstarch

Next, mix in the shaving cream, a little at a time (this is the kind I used).

mixing in shaving cream

Continue to add more shaving cream until you get a fluffy slime that holds its shape. You’ll know it’s butter slime when you can easily spread it!

Tip: If it doesn’t feel as soft and spreadable, add in a little more lotion.

If you make your own butter slime, I’d love to see it! Tag me on Instagram @ab.crafty!

Get the latest DIY tutorials, reviews, and crafting updates

You'll never be spammed and can unsubscribe at any time

pulling fingers through the yellow butter slime to spread it

We of course have to show off the beautiful drizzle! It’s not quite as voluminous as fluffy slime, but it gives a faster and silkier drizzle.

drizzling the yellow butter slime onto the table

One of the most fun things to do with it is to shape it into an actual stick of butter and pretend you’re cutting some off!

using a knife to cut a pad of "butter" off the end of the butter slime shaped into a stick of butter

It’s so much fun to spread!

using a knife to spread the yellow butter slime that has been shaped into a stick of butter

Troubleshooting Butter Slime

These are common problems that can happen. Thankfully, each can be easily solved by adding a little bit more of a key ingredient. For each, be sure to add only a little bit at a time.

  • Too Sticky: Use a little more activator.
  • Doesn’t Spread: Use more lotion.
  • Doesn’t Hold its Shape: Use more shaving cream.
  • Doesn’t Have Silky Texture: Use more corn starch.

More DIY Slime Recipes

Get the latest DIY tutorials, reviews, and crafting updates

You'll never be spammed and can unsubscribe at any time

top image shows the slime shaped into a stick of butter with a knife cutting into it and the bottom image shows the slime drizzled onto the table. the title reads "step by step tutorial - butter slime, abcrafty.com"

Butter Slime

Easily make butter slime with this simple recipe. You’ll be stretching, drizzling, and spreading this DIY slime in just a few minutes!
Yield 1 Butter Slime
Project Time 5 minutes
Total Time 5 minutes

Materials
  

  • ¼ Cup White Glue
  • Yellow Food Coloring
  • 1 Tbs Lotion
  • ¼ Cup Cornstarch
  • 1 Cup Shaving Cream

Slime Activator

  • 1 Cup Warm Water
  • 1 tsp Borax

Equipment

  • 1 Bowl
  • 1 Spoon

Instructions
 

Make the Butter Slime Base

  • Mix the glue and food coloring in a bowl
    ¼ Cup White Glue, Yellow Food Coloring
    dropping yellow food coloring into white glue in a glass bowl
  • Add in the slime activator a little at a time. Just until clumps start to form. You can make your own activator by mixing 1 cup warm water with 1 tsp of borax.
    1 Cup Warm Water, 1 tsp Borax
    pouring a small amount of slime activator into a bowl with yellow glue
  • Mix and stretch it until it becomes a stretchy slime.
    lifting yellow glue and activator out of a bowl and stretching it

Add the Key Ingredients for Butter Slime

  • Add in some lotion. Start with a small amount (~1/2 teaspoon)
    1 Tbs Lotion
    squeezing bath and body works lotion onto yellow slime
  • Mix in the cornstarch, a little at a time.
    ¼ Cup Cornstarch
    mixing cornstarch into the base
  • Continue mixing in cornstarch until the slime becomes matte, instead of shiny. When you stretch it, it should be slow to stretch and have little ripples that hold their shape, like in the image.
    stretching the yellow slime mixed with cornstarch
  • Mix in the shaving cream, a little at a time (this is the kind I used).
    1 Cup Shaving Cream
    mixing in shaving cream
  • Continue to add more shaving cream until you get a fluffy slime that holds its shape. You’ll know it’s butter slime when you can easily spread it!
    using a knife to spread the yellow butter slime that has been shaped into a stick of butter
Keyword Butter, Slime, Slime Activator
Picture of Daniela Kretchmer

Daniela Kretchmer

Daniela is a lifelong crafter who loves to share her passion for crafting. Through classes or learning on her own, she likes to say she'll do pretty much any craft aside from scrapbooking. Her current personal obsessions include garden crafts, felting, and spinning yarn.

More Craft Projects and Ideas

Leave a Comment

Your email address will not be published. Required fields are marked *

Rating