Make your own tie dye sweatshirt. Learn tie dyeing basics to make your own custom sweatshirt and how to tie dye a rainbow swirl.
Table of Contents
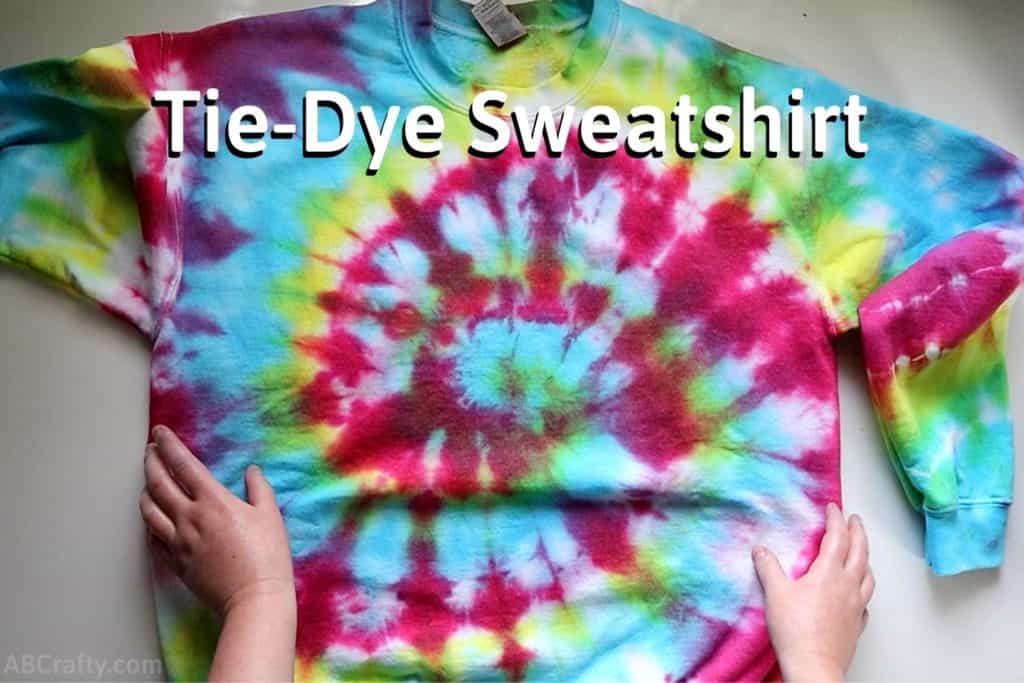
A great summertime craft is tie-dyeing and I have officially gone tie-dye crazy. I’m already getting ready for winter with this tie dye sweatshirt so I’m excited to share how to tie dye your own sweatshirt.
If you’ve tie dyed shirts or other clothing, you’ll know the basics of tie dyeing. The main difference when tie dyeing a sweatshirt is you need to account for the sleeves. You also really have to make sure you use enough dye since it uses more than a tie dye t-shirt.
You can even make tie dye sweatpants for a full tie dye sweatsuit!
And for a full set of tie dye clothing, make some tie dye socks, tie dye shirts, tie dye Crocs, tie dye shoes, tie dye shorts, or try dyeing colored clothes using this bleach tie dye method (also known as reverse tie dye). Or go for a completely different look and try ice tie dye or use pastel colors.
Be sure to review my recommendations for the best tie dye kits.
Note: Some links in this post may contain affiliate links, which means at no cost to you, I may earn a commission.
Which Sweatshirts are the Best to Tie Dye?
When learning how to tie dye a sweatshirt, the material is the most important part. Therefore it’s best to use 100% cotton and plain white. Especially with a tie dye kit, a 100% white cotton sweatshirt will make sure the dye sets well.
Less than 100% cotton is totally fine as well, but when you get to more than 50% synthetic material (e.g. polyester), the dye may rinse out and you’ll end up with a very pale tie dye sweatshirt.
You can also tie dye a colored shirt, but the colors you use to tie dye may not show up as expected.
In terms of the cut or style, you can tie dye a hoodie, zip up hoodie, or zip up sweatshirt – they all can be tie dyed! The only consideration is the shape and the design you want to make. If you want to make a tie dye women’s sweatshirt, they tend to have more curves so straight lines will get curved on the sides. If you wan to tie dye a men’s sweatshirt, you have more straight lines on the sides.
Where to Get Sweatshirts to Tie Dye
Typically craft stores will carry 100% cotton sweatshirts and other dyeable clothes to dye. For example I got this one from Michael’s. You can also get the same one Amazon. I’d say 99% of the time I get my tie dye blank clothes from craft stores or Amazon.
I specifically wanted to tie dye a sweatshirt without a hood, but you can also dye any other type of sweatshirt, such as a hoodie or zip up hoodie. Take a look at the different stores and online for whichever type of sweatshirt you want to tie dye.
Don’t forget to pin it so you can come to it later!
Materials to Make a Tie Dye Sweatshirt using a Tie Dye Kit
- Plain White Cotton Sweatshirt (Amazon)
- Tie Dye Kit or Tie-Dye Dye and Soda Ash (I used the Jacquard Tie Dye Kit that has both soda ash and tie-dye dye, which you can get on Amazon, Michael’s, or Blick Art Materials)
- Rubber Bands (I have these)
- Plastic Wrap
- Latex Gloves
- Paper Towels
Instructions for How to Tie Dye a Sweatshirt
Preparing the Sweatshirt for Dye
Start with a plain white sweatshirt (this is the one I’m using). It’s best to wash it before you start to ensure there’s nothing on it to prevent the dye from reacting properly. Though full disclosure, I did not wash mine, but I definitely don’t recommend this.
I opted to not tie dye a women’s sweatshirt for this project simply because I’m going to use it a sleep shirt and I prefer the cut of a men’s sweatshirt.
After you wash it, take it out when wet. Or if you start with a dry sweatshirt, soak it in water and ring it out so it’s damp and not dripping.
The reason you want the sweatshirt to be damp is it’s actually easier to shape, tie, and prepare for dye. You want it to be tied tightly so that the patterns show up well. Therefore getting it wet removes the air and allows the sweatshirt to be tied tightly.
Now it’s time to shape the sweatshirt for dyeing. All you need to do is wrap, scrunch, fold, or twist the sweatshirt and tie it up with some rubber bands.
There are also a bunch of designs and techniques you can use to make a tie dye sweatshirt (such as a heart design). But I went with a classic spiral tie dye design.
To make the spiral design, pinch the middle of the sweatshirt. Make sure you grab the back as well so that both sides get dyed.
Then twist the middle so that the fabric from where you’re pinching.
When you get to the sleeves, make sure it has some pleats and folds.
Then wrap the sleeves around the rest of the sweatshirt.
Keep wrapping the sleeves around and twisting from the middle so that it’s a nice tight spiral. Make sure it lays flat and that the layers don’t bunch up on top of each other.
Once it’s nice and tight, wrap a rubber band across the middle.
Continue to add rubber bands so it’s all held together.
Prepare the Soda Ash Mixture and Sweatshirt for Tie Dye
If your tie dye kit is a one step tie dye kit such as Tulip One Step Tie Dye Kits, you don’t need to do this section. Though I do still recommend it as the colors will be more vibrant.
However if your tie dye kit uses soda ash, mix 1 cup of soda ash into a gallon of warm water.
Make sure there’s enough liquid to soak the sweatshirt. I had to mix up to batches so I used 2 cups of soda ash and 2 gallons of water.
Stir it up until the soda ash dissolves.
Place the wrapped up sweatshirt in the soda ash mixture and soak it for at least 20 minutes.
Tip: Squish it and flip it over while soaks so that it the mixture incorporates completely. It’s also a good idea to separate the folds.
Mix the Tie Dye from the Tie Dye Kit
Typically the instructions are to add warm water to the bottles up to a line marked on the bottle. This was the case with the Jacquard Tie Dye Kit, which you can get on Amazon. It came with three primary colors (red, blue, and yellow).
After you fill them, shake the bottles so that the dye powder dissolves. Check the bottom of the bottles to make sure all the powder is mixed in. For example in the photo below there’s still dye that needs to be mixed in.
Tip: When shaking the dye bottles, hold them with a paper towel in case there are leaks. See that corner of yellow and how I’m wearing gloves in this photo and not the previous? Dye got everywhere so I learned that lesson for you!
Which gets to the next tip:
Tip #2: Wear gloves when mixing the dye.
Another way to fill the dye bottles is to fill them with water only part way and dissolve the dye. Then add the rest of the water to the fill line.
Add Dye to the Sweatshirt
Before you start tie-dyeing the sweatshirt, put on gloves and place plastic wrap on the table.
Tip: To make sure the plastic wrap is big enough for the tie dye sweatshirt, overlap them slightly.
Start with the lightest color of dye (in my case it was yellow) and it to different parts of the sweatshirt. Make sure to get both sides.
For my spiral tie dye design I added the yellow to ones of the segments made by the rubber bands. Then I flipped it over and added yellow to the other side of the same segment.
Continue to add the lightest color of dye wherever else you want it.
For the spiral tie dye design, I wanted to have the pattern repeat so I added yellow to the opposite segment.
How to Make Sure You Have Enough Dye on Your Tie Dye Sweatshirt
One of the biggest mistakes you can make while tie dyeing is to not add enough dye. If you don’t add enough tie dye, you’ll end up with a mostly white sweatshirt.
Therefore a way to make sure you have enough dye on your tie dye sweats (especially since a sweatshirt is thick and therefore naturally will need more dye) is to separate the layers. When you check in between the layers, make sure it’s not all completely white. Stick the bottle of dye between the layers and squeeze out the dye.
Another way to make sure there’s enough dye for your tie dye sweats is to squish the sweatshirt. Squish the dye into the sweatshirt to help it spread.
Then add the next color. Since I wanted to make a rainbow spiral tie dye sweatshirt, I added the red tie dye next to the yellow.
Then add the next color, which for me to continue the rainbow tie dye was putting blue next to the yellow.
Continue adding dye until the sweatshirt is covered in dye where you want it.
I originally thought I wanted a section of white, but then I realized that wouldn’t make purple so I added more blue and red and squished the two colors together.
Make Sure the Dye Colors Don't Mix Where You Don't Want Them
As you’re tie dyeing, while you want to make sure there is enough dye on the sweatshirt, you don’t want it dripping or all the colors will mix together and make brown.
Another way to prevent this is by using paper towels to wipe up the dye that’s on the plastic.
Set the Dye on the Tie Dye Sweatshirt
Pick up the plastic wrap off the table and carefully wrap it around the tie dyed sweatshirt. Wrapping it up helps keep the moisture inside, which is necessary for the dye to set. You don’t want it to dry out!
Leave it for 12-24 hours so the tie dye can set. I left my sweatshirt for 24 hours to make sure the dye sets (especially since I didn’t prewash it).
Rinse the Dye off the Tie Dye Sweatshirt
While still tied, rinse the sweatshirt under warm water.
I definitely recommend wearing gloves for this since as you can see the dye will get everywhere.
Then as the initial dye rinses out you can start taking off the rubber bands. I like to salvage the rubber bands, but you can also cut them off to make it easy.
Then continue to rinse the sweatshirt under water until the water starts to run clear.
Once the water is clear, throw it into the wash. Having the water more clear will ensure you don’t get the washing machine covered in dye.
Just as a precaution, wash it alone or with other tie dyed clothes to make sure nothing else accidentally gets dyed.
Get the latest DIY tutorials, reviews, and crafting updates
You'll never be spammed and can unsubscribe at any time
Run it through the dryer and voila, your tie dye sweatshirt is ready to wear!
I always get so excited when a tie dye spiral comes out nicely.
And I just love the sleeves – the rainbow striping is so fun!
But regardless of what tie dye design you go with, make sure to tag me on Instagram @ab.crafty so I can see your tie dye sweatshirt!
And if you want to customize it even further, you can add text or graphics to it using sublimation!
More Tie Dye Crafts to Try
Get the latest DIY tutorials, reviews, and crafting updates
You'll never be spammed and can unsubscribe at any time
Tie Dye Sweatshirt
Materials
- White Cotton Sweatshirt
- Tie Dye Kit or Tie-Dye Dye and Soda Ash
- Water
- Rubber Bands
- Plastic Wrap
- Latex Gloves
- Paper Towels
Equipment
- Bucket or Plastic Bin
Instructions
Prepare the Sweatshirt for Dye
- Soak the sweatshirt in water and ring it out so it’s damp and not dripping.White Cotton Sweatshirt, Water
- Shape the sweatshirt by wrapping, scrunching, folding, and/or twisting it into your desired pattern.
- Wrap rubber bands around it to secure.Rubber Bands
Prepare the Soda Ash Mixture and Sweatshirt for Tie Dye
- If your tie dye kit is a one step tie dye kit such as Tulip One Step Tie Dye Kits, you don’t need to do this section.However if your tie dye kit uses soda ash, mix 1 cup of soda ash into a gallon of warm water. Stir it up until the soda ash dissolves.
- Place the wrapped up sweatshirt in the soda ash mixture and soak it for at least 20 minutes.
Mix the Tie Dye from the Tie Dye Kit
- Add warm water to the bottles up to a line marked on the bottle of dye powder of the tie dye kit.Tie Dye Kit or Tie-Dye Dye and Soda Ash
- Shake the bottles so that the dye powder dissolves. Check the bottom of the bottles to make sure all the powder is mixed in.
- Repeat the process for all of the colors of tie dye.
Add Dye to the Sweatshirt
- Before you start tie-dyeing the sweatshirt, put on gloves and place plastic wrap on the table.Latex Gloves, Plastic Wrap
- Start with the lightest color of dye (in my case it was yellow) and it to different parts of the sweatshirt. Make sure to get both sides.
- Check in between the layers and folds and make sure it’s not all completely white. Stick the bottle of dye between the layers and squeeze out the dye.
- Add the next color of dye.
- Continue adding dye one color at a time until the sweatshirt is covered in dye where you want it.
- Use paper towels to wipe up the dye that’s on the plastic in between the colorsPaper Towels
- Pick up the plastic wrap off the table and carefully wrap it around the tie dyed sweatshirt. Leave it for 12-24 hours so the tie dye can set.
Rinse the Dye off the Tie Dye Sweatshirt
- While still tied, rinse the newly tie dyed sweatshirt under warm water.
- As the initial dye rinses out you can start taking off the rubber bands. You can either remove them to save them or you can also cut them off to make it easy.Then continue to rinse the sweatshirt under water until the water starts to run clear.
- Throw the sweatshirt into the washing machine to finish removing any extra dye. Then run it through the dryer and your tie dye sweatshirt is ready to wear!