Learn how to make agate slices out of candy. This unique rock candy geode slice is great on its own or as a decoration on top of geode cakes.

I absolutely adore these DIY agate slices and they’re so easy to make. They make for a different take on your classic rock candy since these are actually edible geodes. You could even trick your friends into thinking you’re eating rocks!
Since geode cakes have become popular, these also are perfect as geode cake toppers.
And if you’re a geology fan, you could make your candy look like the real gemstones. I made my take on blue agate and pink agate, but there are so many different types of these gemstones including black, white, purple, and yellow.
Note: Some links in this post may contain affiliate links, which means at no cost to you, I may earn a commission. I am likely linking to items that can be trickier to get, making it easier for you to find the supplies you need.
Ingredients for Candy Agate Slices:
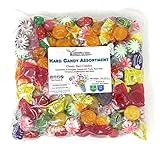
- Hard candy in different colors (the dollar store will be your best friend here)
- Plastic bags
- Aluminum foil
- Cooking Spray
- Edible Glitter (Optional – I used gold and silver on some of mine)
Template for the Agate Slice Molds
To make it easy to create the molds, I’ve put together this candy mold template you can use. Download it below or in the shop. Feel free to scale it to whatever size you would like to make your candies.

Download the Free Template
We’re committed to your privacy. AB Crafty uses the information you provide to contact you about relevant content and products. You may unsubscribe from these communications at any time.
Instructions to Make the Candies
Start by unwrapping the hard candy and sorting them by color into different plastic bags.
Tip: I also recommend taking note of what flavors they are so you can remember. This way you don’t do something like combine root beer and mint (unless you’re into that sort of thing).

Using a heavy object, crush the candies. Set them aside.

Tear off a small piece of aluminum foil and cut a hole in the middle.

Lift the edges of the hole and fold it on itself to make a wall of foil around the hole. You can also use my free agate slice mold template to make it easier to shape the molds.

Do the same process to the outside. This outer-wall will shape the edge of your agate slice so you can make it an oval or any shape you’d like.

Repeat the process for the number of rock slices you’d like to make.

Spray the agate molds with cooking spray. (I missed the photo, but be sure to not skip this step or it will be impossible to remove them from the molds!)
Next, choose the color you’d to be in the center of the slice and using a spoon or popsicle stick, spoon some of the crushed candy around the center hole of the mold.
Push it towards the center in an even ring.

Choose another color of crushed candy and do the same thing, laying a new ring around the first. You can also mix colors to make new ones in case you don’t have a color you want. For example, you can make purple with blue and red.

Continue with as many colors as you’d like until you have filled the mold. I personally like mixing the clear and opaque candies as different layers.
Tip: Make sure you add enough candy, otherwise it will be too thin and break when trying to remove it from the mold. So when in doubt, use more.

Place them on a baking tray and bake them at 300 F (149 C) for around 4 minutes or until the candies have melted.
Let them completely cool.

Carefully remove them from from their tin foil molds.

Combine a little bit of the gold edible glitter (~1/4 teaspoon) with a couple drops of water. I just used a scrap piece of tinfoil for this.

Using a paintbrush, paint the edges of the candy agate slices with the edible glitter mixture.

Let them dry and then you have your finished candy agate slices. You can use them on their own or as adorable geode cake toppers or cupcake toppers.
Look at all of the different variations you can make from yellow agate to green agate to mixing them all together. Be careful to not mix too many colors though or you’ll end up making brown (unless that’s what you’re going for).
Get the latest DIY tutorials, reviews, and crafting updates
You'll never be spammed and can unsubscribe at any time


If video is more your thing, you can also watch the full DIY candy agate slice tutorial below.

DIY Candy Agate Slices
Materials
- Hard candy in different colors
- Plastic bags for each color
- Aluminum foil
- Cooking spray
- Edible Glitter Optional - I used gold and silver on some of mine
Equipment
- Hammer or heavy object
- Exacto knife
- Paintbrush
Instructions
- Using a heavy object, crush the candies. Set them aside.
- Cut a hole in a small piece of aluminum foil.
- Lift the edges of the hole and fold it on itself to make a wall of foil around the hole. You can use this free template as a guide.
- Do the same thing to the outside. This outer-wall will shape the edge of your agate slice so you can make it an oval or any shape you’d like.
- Repeat the process for the number of rock slices you’d like to make. Then spray them with cooking spray.
- Spoon some of one color of the crushed candy around the center hole of the mold.
- Choose another color of crushed candy and do the same thing, laying a new ring around the first.
- Continue with as many colors as you’d like until you have filled the mold.
- Place them on a baking tray and bake them at 300 F (149 C) for around 4 minutes or until the candies have melted.
- After letting them cool, carefully remove them from from their tin foil molds. Set aside.
- Mix a little bit of the gold edible glitter (~1/4 teaspoon) with a couple drops of water.
- Using a paintbrush, paint the edges of the candy agate slices.
- Let them dry and then you have your finished candy agate slices.
Video
Notes
- Use the free downloadable template to shape the agate slice molds.
- I also recommend taking note of what flavors they are so you can remember. This way you don’t do something like combine root beer and mint (unless you’re into that sort of thing).
- Make sure you add enough candy, otherwise it will be too thin and break when trying to remove it from the mold. So when in doubt, use more.