
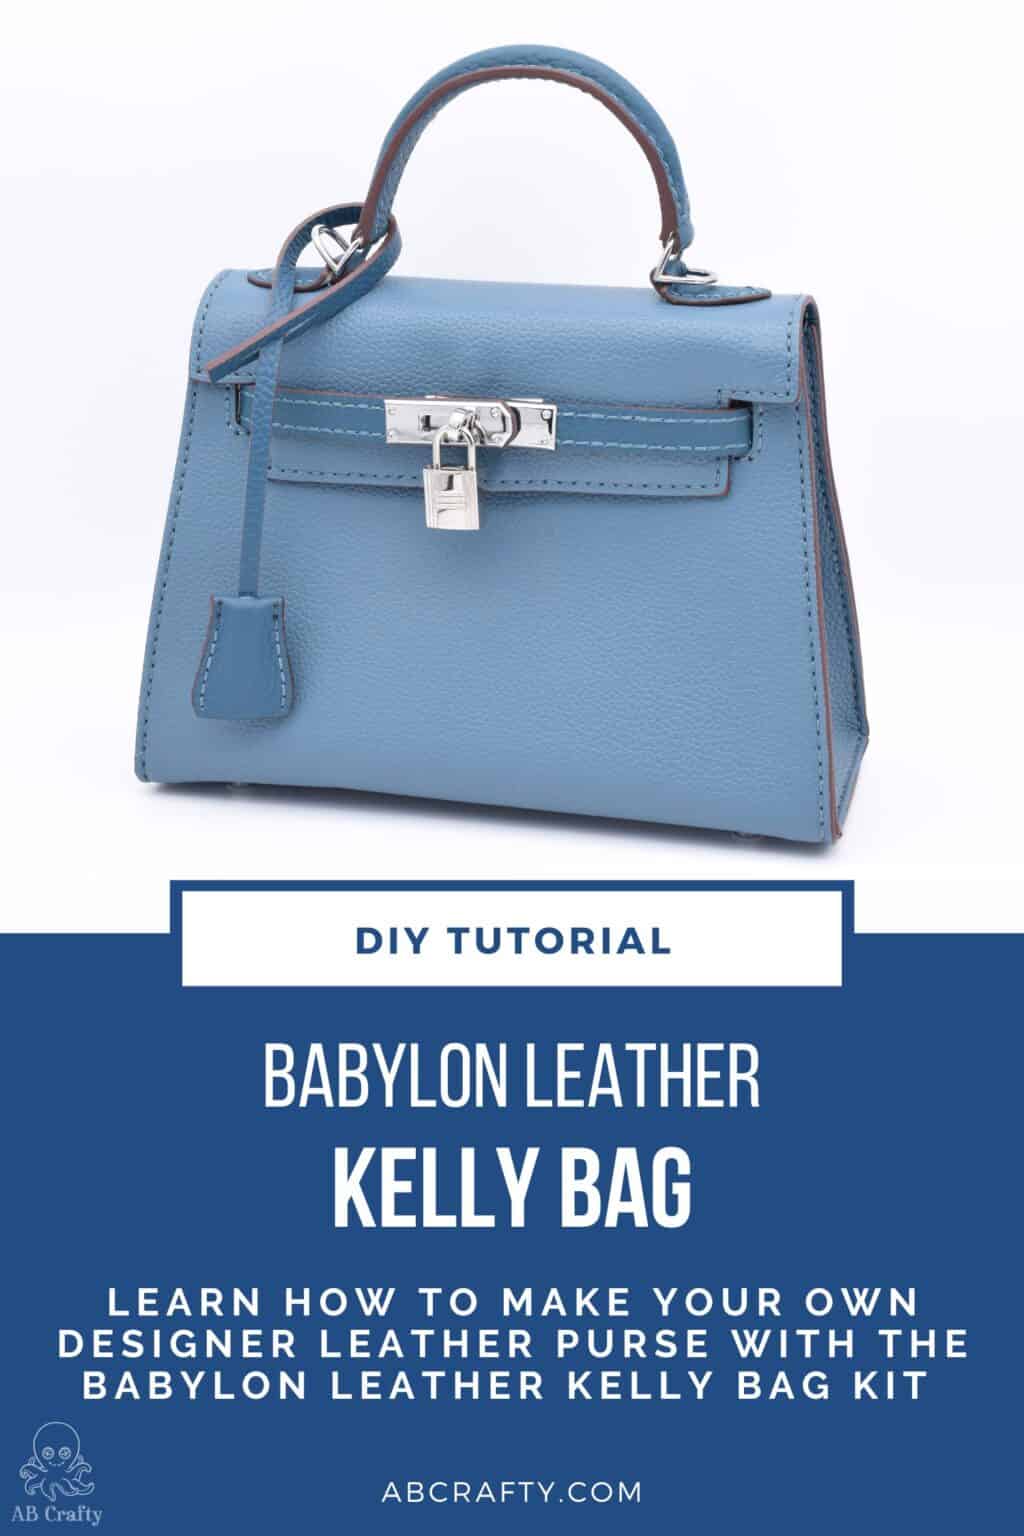
Ever wanted to make your own designer leather purse? I tested the Babylon Leather Kelly Bag DIY Kit and made a full video tutorial to help you build it – perfect for beginners! Here’s my honest review, detailed steps, and everything you need to know before getting started.
Table of Contents
Have you ever wanted to try leather crafting but didn’t know where to start? Same here! I was sent the Babylon Leather Kelly Bag kit (this one) and it was my first intro to leatherwork. In this post (and in my video tutorial), I’ll walk you through the entire process, share my honest review, and give you all the tips I wish I had before starting. Whether you’re a beginner or just curious about making your own bag, you’re in the right place!
And if the Birkin is more your thing, you can also see my review of the Babylon Leather Birkin Bag Kit.
Note: Some links in this post may contain affiliate links, which means at no cost to you, I may earn a commission.
Get the latest DIY tutorials, reviews, and crafting updates
You'll never be spammed and can unsubscribe at any time
Don’t forget to pin it so you can easily come back to it later!
Babylon Leather Coupon Code: ABCRAFTY
If you’re interested in getting the Babylon Leather Kelly Bag Kit, you can get it here. And be sure to use my coupon code: ABCRAFTY
It will get you an additional 10% off on top of whatever sale they’re running. This means you’ll likely get a total of 25-35% off using my code.
Instructions for the Babylon Leather Kelly Bag
I created my own video instructions to create the bag. I found their instructions so deeply frustrating, that I wanted to help everyone else also confused by it. Hope it helps!
And below the video, I’ve broken out an overview of the steps if you’re just getting a feel for what the process is.
You can grab the exact Kelly Bag DIY kit I used in the video directly from Babylon Leather’s website (be sure to use code ABCRAFTY to get an additional 10% off!)
Overview of the Babylon Leather Kelly Bag Assembly Process
- Prepare Your Materials – Thread your needles and get comfortable with the basic stitch. You’ll use the same stitch through the entirety of the bag making process.
- Assemble the Core Pieces – Sew the pocket, side panels, base, and main body sections together.
- Add Functional Details – Attach the lanyard, key strap, and internal pocket.
- Construct and Attach the Handle – Build the handle and stitch it securely in place (I found this part challenging as you need to make sure it’s super tight!)
- Install Hardware – Add the bottom studs, clasp, strap hardware, and other accessories.
- Final Assembly – Weave the straps, secure everything, and admire your finished bag!
You May Also Like...


What's Included in the Kit?
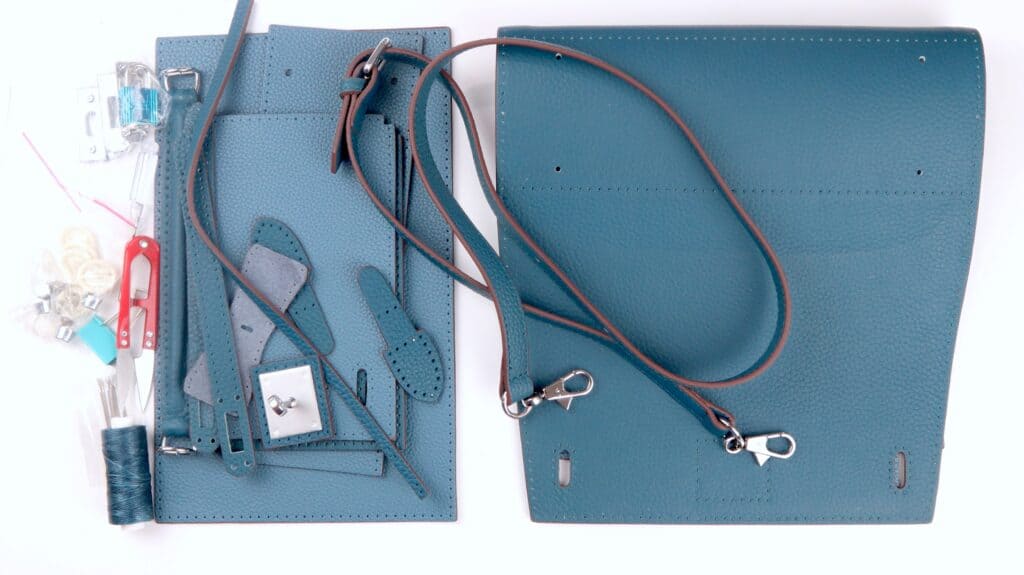
This all-in-one kit comes with (almost) everything you need:
- Pre-cut and pre-punched genuine leather pieces
- Matching hardware (buckles, clasps, studs, and lock)
- Wax thread and needles (a bunch of extra needles!)
- Finger grips
- Snippers
- Binder clip
The one thing it doesn’t come with is a lighter, which you will use to melt the ends of the thread to keep them from fraying (you can also use an thread burner like this one, which you can get for 15% off with code ABCRAFTY) . I also found it helpful to have a pair of scissors, but that’s just because my snippers arrived broken.
Get the latest DIY tutorials, reviews, and crafting updates
You'll never be spammed and can unsubscribe at any time
My Honest Review of the Babylon Leather Kelly Bag Kit
Review of the bag making process
This was my first leather crafting project, and long story short – I absolutely loved it! Once I got the hang of the stitch, I was absolutely hooked on this kit. It was super satisfying to feel the wax thread go through the leather and watch all the flat panels slowly come together into a fully structured, elegant handbag.
Although you’re repeating the same stitch over and over again, I enjoyed the meditative process. I expected to be working on it a little at a time, but then I’d look at the clock and several hours went by. I really did love making this purse and was genuinely sad when I got to the last few stitches. The positive is at least I got a gorgeous bag in the end that I kept showing off to my husband.
The downside is it did hurt my fingers a bit, especially after working on it for long stretches. But that could also be because I didn’t take enough breaks (I got too into it!). If you’re planning to make this kit, I’d recommend pacing yourself and giving your hands a rest between sections.
Even with that minor discomfort, the overall experience was incredibly rewarding. The end result looks legit (to me at least! but again, I’m not a luxury brand person), but I personally think it’s even more special knowing you made it yourself.
Review of the instructions
Just a heads-up: the instructions are not good, to put it lightly. First off, they only have video instructions. The issue with their video is it’s overall difficult to understand due to the language barrier (it’s only in captions and they are not great translations), some steps aren’t shown clearly, the thread measurements are often incorrect, and they don’t provide tips for difficult parts.
That’s exactly why I made my own detailed tutorial—to help fill in the gaps and make the process easier to follow.
Watch my step-by-step video here.
Pros and Cons
Pros
- High-quality materials – Real top-grain leather and solid metal hardware.
- Beginner-friendly – Everything is pre-punched so you don’t have to worry about that. This was also my first leather project so as a beginner myself, I was able to do it!
- Luxury look for a DIY price – I mean it’s a dupe of the actual Hermes Kelly Bag, so for this price it’s pretty crazy. And you get to make it yourself!
- Thread choice – you get to choose whether you want white thread or thread that matches the color of the leather you select (I personally like the matching color!)
Cons
- Need to supply your own lighter – I get that it would be difficult to ship a lighter, but it ultimately is a bummer that you’re all ready to go and then realize you need to get another tool. But now that you’re reading this you’ll be prepared!
- Terrible instructions – As mentioned, the video instructions are just bad and there are no written instructions. Though this part is solved (hopefully!) with my own video instructions.
- Some hardware can be tricky to align perfectly – I had a lot of trouble with one of my clasps not aligning, which I believe was due to a cutting error. This then causes the front to warp a bit, but thankfully it’s not really noticeable (but worth mentioning)
Final Thoughts
Aside from the price, I absolutely love this kit! And while the instructions were terrible, I hope I’ve solved that problem with my own instructions.
So if you’re at all interested, I’d say go for it. It especially would be a great gift for a crafter!
And don’t forget, you can get an additional 10% off with code ABCRAFTY!