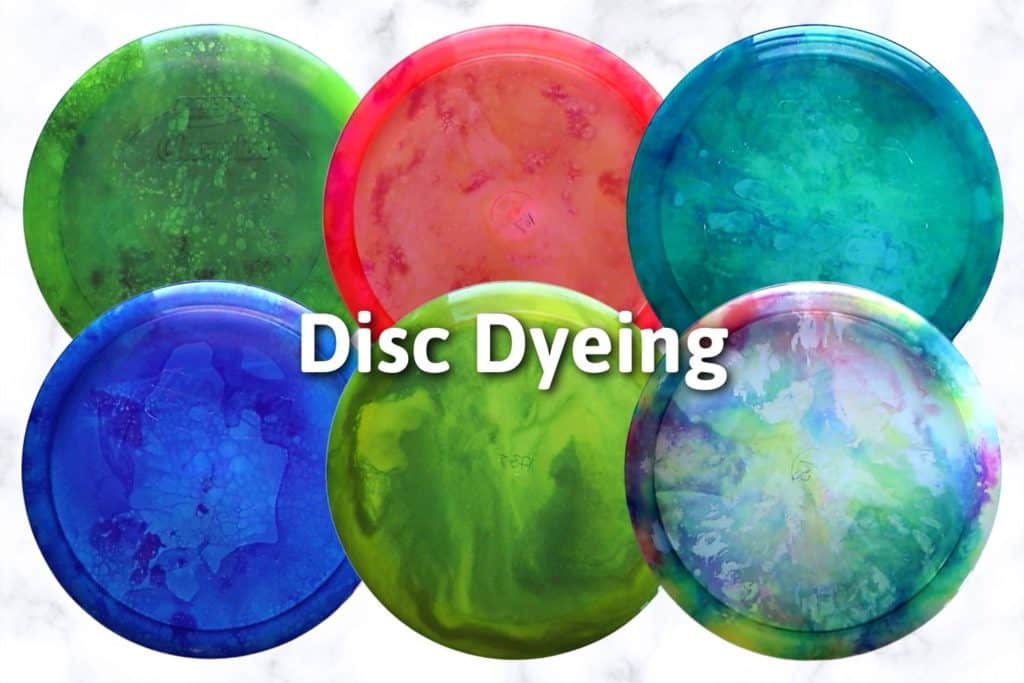
Disc Dyeing

6 dyed disc golf discs of different colors with the title "disc dyeing"

Customize your disc golf discs with these disc dyeing techniques. It’s surprisingly easy and fun to dye disc golf discs!

Table of Contents

I randomly stumbled across the concept of disc dyeing while I was making gifts for the holidays. My boyfriend and I will casually play frisbee golf, along with his family so getting them all discs that match their throwing styles and then dyeing the discs myself I figured would be a great gift. 

These are a fun way to customize your own discs or give them as gifts like I did! There are a bunch of different dyeing techniques you can use – all of them making one of kind discs. Some use a similar method as the tie dye Crocs I previously made and some leverage the ice dyeing technique. Use a different technique for different effects, including a whole tie dye look. You can also use stencils for crisp details.

Note: Some links in this post may contain affiliate links, which means at no cost to you, I may earn a commission.

Get the latest DIY tutorials, reviews, and crafting updates

You'll never be spammed and can unsubscribe at any time

Which Discs are Best for Disc Dyeing?

You may be surprised to learn that not all disc golf discs work well for disc dyeing. You’ll want to keep that in mind when selecting your disc as typically, the cheaper ones won’t take the dye well. You can use this chart, created by disc dyer, Scott Case, to make sure the ones you get will show the color well.

Something else to keep in mind is whether you get a transparent or opaque disc. All of the ones I’ve used here are transparent like this one, but opaque discs like this one will provide a more vibrant color.

Then if you want the color to be as close to the dye color as possible, use a white disc. Otherwise, the base color of the disc will cause the dye to look different than expected. Similarly, lighter disc colors will allow the dye colors to show through more versus darker discs.

Which Dyes Should You Use for Disc Dyeing?

Because all disc golf discs are made of plastic, you need to use a synthetic dye. This is different than your standard tie dye dyes. Synthetic dyes can come in either a powder or a liquid form – either is fine to use.

You can also use dyes specifically for disc dyeing – I have yet to try them out and am still not sure as to whether they’re different than regular synthetic dyes.

Therefore there are 3 main brands:

Don’t forget to pin it so you can easily come back to it later!

6 dyed disc golf discs in different colors with the title "7+ disc dyeing ideas, www.abcrafty.com"

Materials for Disc Dyeing

If you’re more interested in dyeing vs the discs themselves, you could also instead get this kit that has 2 discs, 7 PRO chemical dyes, and a stencil.

Then depending on the technique you’d like to use, you’ll need the following:

  • Shaving Cream
  • Conditioner or Shampoo (I like to grab this from the dollar store)
  • Stencil or Stencil Vinyl (Amazon)
  • Plastic Wrap
  • Plastic Frisbee (I picked mine up at the dollar store, but you can also get this cheap set of 6 from Amazon)
2 examples of using the shaving cream method and stencil method of disc dyeing with 6 different dyed disc golf discs on the bottom. The title reads "step by step instructions - how to dye disc golf discs, abcrafty.com"

How to Dye a Disc Golf Disc

Prepare the Disc for Dyeing

Regardless of the method you use to dye your disc, you’ll need to prepare it by removing any text or images already on it.

You can do this by using acetone and a paper towel. You can easily find acetone at the drug store or on Amazon. You can also use nail polish remover.

Note: Be careful with the acetone. It is possible for the acetone to also burn through the disc itself, technically making the weight off. However, if you are a casual player, any changes will not be noticeable. Either way, use only the amount you need and be cautious with it.

pouring acetone onto a paper towel above a frisbee golf disc
wiping a disc golf disc with a paper towel and acetone, removing the design

Disc Dyeing Techniques

After you prepare you disc, you can choose the method you’d like to use. Click on the links or images below to see how to make that design.

3 images showing the process of adding dyes to shaving cream and putting a pink frisbee golf disc into it and the finished dyed disc golf disc. the title reads "step by step instructions - disc dyeing with shaving cream, abcrafty.com"

Disc Dyeing Techniques Using Shaving Cream

There are a variety of ways to use shaving cream to dye discs. The idea behind the shaving cream is it allows you to dissolve powdered dye into it to create a thick paste to work with. Or if you use liquid dye, then the shaving cream thickens it, allowing you to easily work with it.

3 dyed disc golf discs in purple, green, and red

Prepare the Disc Dye with Shaving Cream

Unless you’re using the powdered dye and shaving cream method, you’ll need to prepare the dyes.

To prepare the disc dyes with shaving cream, put on some gloves and add a little bit of shaving cream into a cup and a little bit of powdered or liquid dye. I used the iDye Poly in Violet and Rit Synthetic Dye in Pink.

pouring purple idye poly from the packet into a paper cup with shaving cream in it
pouring pink synthetic dye from a bottle into a paper cup with shaving cream in it

Then mix in a little bit of water to help give it a creamy consistency.

pouring water from a measuring cup into a paper cup with shaving cream and purple idye poly

You can also add in a little bit of acetone (Amazon). Just like when cleaning the discs, the acetone helps burn through the out layer, allowing the dye to adhere to the plastic.

Repeat the process for each color you’d like to use.

pouring acetone into the bottle cap next to a paper cup with shaving cream and purple dye

Prepare the Shaving Cream Base

Next, you need to prepare the based to make your design. To do so, mix just shaving cream with a bit of water. Again, you want the consistency to be creamy – think like a milkshake.

pouring water from a measuring cup into a larger measuring cup with shaving cream in it

Then lay down some plastic wrap and spread the shaving cream mixture into a circle on top.

using a plastic spoon to smear shaving cream into a circle on plastic wrap

For this method, start by preparing the dyes and base according to the basic shaving cream method instructions.

Then take your dyes and add drops of color randomly on top.

Repeat the process for each color you’d like to use.

using a spoon to add drops of purple dye onto a circle of shaving cream on plastic wrap

Then use the back of the spoon to hand-swirl the colors together.

For mine, I made a spiral and then drew lines from the center.

using a spoon to make a swirl within a circle of shaving cream and purple and pink dye on it
using a spoon to create lines across a circle of shaving cream with dye on it

When you’re happy with how it looks, take your disc and carefully place it face down into the shaving cream and dye.

Make sure it’s completely in the shaving cream by gently pressing down on the back.

pressing a blue disc golf disc into shaving cream and dye on plastic wrap

Then bring the plastic wrap up around the sides.

Note: If you’re using a clear disc like these, be careful to make sure to not let the shaving cream and dye touch the back of the disc. I was careless with this one so it ended up dyeing the back as well. It ended up giving a cool effect, but keep that in mind if you want a cleaner look. You can also first cover the back in plastic wrap and tape to protect it from getting dye on it.

blue disc golf in shaving cream and dye and wrapped in plastic wrap

Leave it to set for at least 12 hours and then wash off the shaving cream and dye.

Tip:  Place it in a tray while it sets as the shaving cream may dissolve and run, dripping off the table.

Get the latest DIY tutorials, reviews, and crafting updates

You'll never be spammed and can unsubscribe at any time

finished blue disc golf disc with blue and purple bubble design

Disc Dyeing with Shaving Cream Method - Disc-Swirled Method

Prepare the base and add dyes according to the basic shaving cream method instructions

Then add your colors randomly in drops on top of the base.

circle of shaving cream with yellow and pink dye on it on top of plastic wrap

Then press the disc directly into the dye, face down. As you press it in, twist it to smear the dyes. You can also drag the disc through the dyes to smear and swirl them.

pressing a pink frisbee golf disc into shaving cream with pink and yellow dye
smearing a pink disc golf disc across shaving cream with pink and yellow dye

Lift the sides of the plastic wrap to help keep the shaving cream and dye moist. Then let it set for 12 hours and rinse it off.

holding finished dyed pink disc golf disc with swirls of pink and yellow

Disc Dyeing with Shaving Cream Method - Powdered Dye

Rather than preparing the base on plastic, spray shaving cream directly into a plastic frisbee (such as one of these). To get streaks of color, don’t fill the frisbee with shaving cream and make the mound taller in the middle.

Then sprinkle the powdered dye over the shaving cream. You’ll therefore either want to use iDye Poly or PRO Chemical disc dyes for this.

sprinkling powdered dye on top of shaving cream in a plastic frisbee
blue plastic frisbee filled with shaving cream with powdered synthetic dye on top

Press the disc face down into the shaving cream.

To keep the streaks, only press it in until the shaving cream reaches the edges. I ended up swirling mine as I didn’t love the look of it.

pushing a yellow disc golf disc into shaving cream and powdered dye in a plastic frisbee

Let it set for 12 hours in the frisbee and then rinse it off.

finished yellow disc golf disc with blue and purple bubble pattern on it

Get the latest DIY tutorials, reviews, and crafting updates

You'll never be spammed and can unsubscribe at any time

Disc Dyeing Using Shampoo or Conditioner

You don’t need to only use shaving cream as the base for disc dyeing. You can use different mediums, including shampoo and conditioner. These are popular because they provide a more fluid base, allowing for colors to swirl more and creating more of a water color effect.

Note: When deciding whether to use shampoo or conditioner (or even body lotion!), you want to decide how thick you want it to be. If you want it to be more runny, use shampoo. If you want the base to be more defined and hold its shape, use conditioner or lotion.

3 dyed disc golf discs in yellow, blue, and rainbow patterns

Prepare the Disc Dyes with Conditioner

The process of preparing the disc dyes is the same as with the shaving cream method.

Whether you use conditioner, shampoo, or lotion, you want to add some to a cup. Then mix in the dyes and a little bit of acetone. If needed, you can add in some water to thin it out. You want them to slowly create a stream as you pour it.

squeezing conditioner from a bottle into a paper cup
holding a spoon with mixed yellow synthetic dye in a cup

Disc Dyeing with Conditioner - Paint Pour

If you’ve ever done paint pouring, this uses the same technique.

Prepare the dyes with conditioner as per above. Then you’ll want to prepare a base without any dyes – so mixing just conditioner and water to thin in out a little bit.

pouring water into a cup with conditioner

Then use a clean cup, tilt it on its side, and carefully add some of each color and the base to create different layers. It doesn’t matter what order they go in and how many layers you do.

pouring conditioner into the side of a cup to create layers of conditioner and dye
cup with layers of conditioner and blue, green, and yellow dye

Then carefully pour it into a frisbee. You can pour it however you’d like- I ended up going back and forth a few times to fill in the frisbee.

pouring dye and conditioner from a red cup into a blue plastic frisbee

If needed, you can tilt the frisbee or use the back of a spoon to create swirls.

tilting a plastic frisbee with conditioner and dye to swirl the colors
using a plastic spoon to swirl blue, yellow, and green dye and conditioner

When you like how it looks, carefully place the prepared disc golf disc face down into the dyes.

Depending on how much dye use, you may need to put a light weight on top of the frisbee to keep it down. Just make sure it’s not touching the bottom of the frisbee.

plastic frisbee with swirled disc golf dye and conditioner
putting a yellow disc golf disc face down into a frisbee with conditioner and dye

Let it set for 12 hours and then rinse it off.

holding the finished yellow dyed disc golf disc

Disc Dyeing with Conditioner - On Plastic

Prepare the dyes according to the conditioner instructions and the base similar to the paint pour method.

Then lay some plastic on the table and pour the dyes and base on the plastic however you’d like.

stripes of yellow, blue, and green synthetic dye and conditioner on plastic wrap

You can then lift the edges of the plastic to swirl the colors.

lifting plastic wrap containing disc golf dye and shampoo so the dyes swirl

When you like how it looks, press the disc golf disc face down into the dye.

Carefully lift up the edges of the plastic to cover the edges.

Tip: Place it in a tray in case the dyes leak.

pushing a blue disc golf disc into swirled disc golf dye and conditioner

Let it set for 12 hours and then rinse it off.

finished blue dyed disc golf disc

Disc Dyeing with Conditioner - Dye Drops

Prepare the dyes according to the conditioner instructions.

Then place plastic on the table and make a mound of conditioner. The idea is you want the fun swirls and texture from the conditioner coming out of the bottle.

Once you have the base ready, add drops of the dye wherever you’d like on top. I used blue, yellow, and pink dyes knowing I wanted to make a rainbow effect.

blue, yellow, and pink synthetic dye on shampoo on plastic wrap

Press in the disc face down into the dye and base.

pushing a clear white frisbee golf disc into shampoo and synthetic dye on top of plastic wrap

Wrap it in the plastic wrap, but be careful to not let the dyes go to the other side.

Tip: Press and smear on the outside of the plastic to help blend the colors.

smearing the conditioner and dye wrapped in plastic around the frisbee disc

Let it set for 12 hours and then rinse off.

Get the latest DIY tutorials, reviews, and crafting updates

You'll never be spammed and can unsubscribe at any time

finished dyed clear disc dyed with rainbow colors

Disc Dyeing with a Stencil

It’s super easy to make your own designs on a disc golf disc using stencils.

I have a Cricut machine, which cuts the stencils for me. I can’t recommend it enough, especially if you intend to make discs using stencils.

If you don’t have die-cutting machine, then you can hand cut your stencils with a blade from stencil vinyl, which you can get on Amazon.

star stencil cut from a cricut machine on the cricut mat

Then use transfer tape to easily remove the stencil and align it on your disc. Carefully remove the transfer tape to reveal the stencil.

I absolutely love transfer tape so I highly recommend it – you can typically find a large roll that’ll last quite a while for around $5 (such as this one on Amazon).

putting a star stencil onto a frisbee golf disc

Then prepare the dye using the shaving cream method and “paint” a thick layer of it along the stencil.

Tip: Make sure all of the edges of the stencil are nicely stuck to the disc. I didn’t notice the corners of mine weren’t stuck completely until it was too late so the dye got under it a little bit.

using a spoon to put dye into the open part of a star stencil on a disc golf disc

Let it set for 12 hours and then rinse it off. You can then repeat the process using different stencils and colors.

clear white disc golf with a dyed blue star in the middle, stacked on cups in a glass pan

Disc Dyeing with Ice

Since I’ve been doing so much tie dye lately, I wanted to see how the ice dye technique would work as a disc dyeing technique. Spoiler alert – it works great, but it’s messy!

Start by raising the disc in a tray. I used upside down cups, but looking back I’d probably use a cooling rack. You need it elevated enough so it doesn’t touch the water when the ice melts.

Then place ice cubes on top and sprinkle the powdered dye over it. I recommend either iDye Poly or PRO Chemical disc dyes.

pouring blue disc dye over ice that's on top of a white disc golf

Add a few drops of acetone over the ice so that as the ice melts, it will bring the acetone with it.

Tip: Use crushed ice instead of cubes as they won’t slide as easily off of the disc.

pouring acetone from a cap over ice with disc dye sprinkled on top of a white disc golf

Eventually the ice will melt after a few hours to reveal a fun watercolor effect!

Note: I had to do mine a couple times as the ice kept sliding off.. and onto the carpet (definitely use a drop cloth for this one!). Therefore in future rounds I decided I just wanted layers of red and blue.

dyed disc golf with a blue start in the middle and red and blue dye across the disc over a glass dish with ice and dye

Let it sit for a full 12 hours (including the time for the ice to melt) and then rinse it off.

I absolutely love the effect of the ice dye and will definitely do this one again using crushed ice.

holding a clear disc golf disc with a blue star and red and blue water color design

More Dyeing Projects

Get the latest DIY tutorials, reviews, and crafting updates

You'll never be spammed and can unsubscribe at any time

holding finished dyed pink disc golf disc with swirls of pink and yellow

How to Dye a Disc Golf Disc With Shaving Cream

There are a variety of disc dyeing techniques, but this shaving cream method is the easiest way to dye a disc golf disc. It creates beautiful and unique, almost watercolor-like swirls.
Yield 1 Dyed Disc Golf Disc
5 from 1 vote
Project Time 20 minutes
Setting Time 12 hours
Total Time 12 hours 20 minutes

Materials
  

  • 1 Disc Golf Disc
  • Acetone
  • Synthetic Dyes
  • Paper Towels
  • Shaving Cream
  • Plastic Wrap
  • Gloves

Equipment

  • Plastic Spoons
  • Mixing Bowls

Instructions
 

Prepare the Disc for Dyeing

  • Use the acetone on a paper towel to wipe off the existing text from the disc.
    1 Disc Golf Disc, Acetone, Paper Towels
    wiping a disc golf disc with a paper towel and acetone, removing the design

Prepare the Dyes

  • Put on gloves and add shaving cream into a cup and mix in a little bit of dye. You can use either powdered dye or liquid dye.
    Synthetic Dyes, Shaving Cream, Gloves
    pouring purple idye poly from the packet into a paper cup with shaving cream in it
  • Add in a little bit of acetone and then water to create a creamy consistency.
    Repeat the process for each color you'd like to use.
    pouring acetone into the bottle cap next to a paper cup with shaving cream and purple dye

Prepare the Base

  • Mix a larger amount of shaving cream with a little bit of water to create a spreadable consistency.
    pouring water from a measuring cup into a larger measuring cup with shaving cream in it
  • Place plastic wrap on the table and then spread the shaving cream mixture into a circle.
    Plastic Wrap
    using a plastic spoon to smear shaving cream into a circle on plastic wrap
  • Add drops of your different dye mixtures.
    circle of shaving cream with yellow and pink dye on it on top of plastic wrap

Dye the Disc

  • Press the disc face down into the dye. As you press it in, twist it and smear it around to help blend and swirl the colors.
    pressing a pink frisbee golf disc into shaving cream with pink and yellow dye
  • Leave it in the plastic wrap to set for at least 12 hours.
    Then rinse it off and your dyed disc is ready to use!
    holding finished dyed pink disc golf disc with swirls of pink and yellow

Notes

Note that only some discs take the dye well. This is similar to the one I used.
Be sure to use synthetic dyes or disc dyes - this is a good starter set that comes with a variety of colors.
Keyword Disc Golf, Dye, Frisbee Golf, Tie Dye
Picture of Daniela Kretchmer

Daniela Kretchmer

Daniela is a lifelong crafter who loves to share her passion for crafting. Through classes or learning on her own, she likes to say she'll do pretty much any craft aside from scrapbooking. Her current personal obsessions include garden crafts, felting, and spinning yarn.

More Craft Projects and Ideas

2 thoughts on “Disc Dyeing”

  1. 5 stars
    Great tips! Very informative. Don’t know if you knew this, but you don’t have to wipe the stamps off of the discs to dye them. The dye will not dye over the stamp. And it makes for a very cool “stock” disc. Appreciate the time and effort you put into all this. Anyone who reads it will definitely benefit from it.

Leave a Comment

Your email address will not be published. Required fields are marked *

Rating