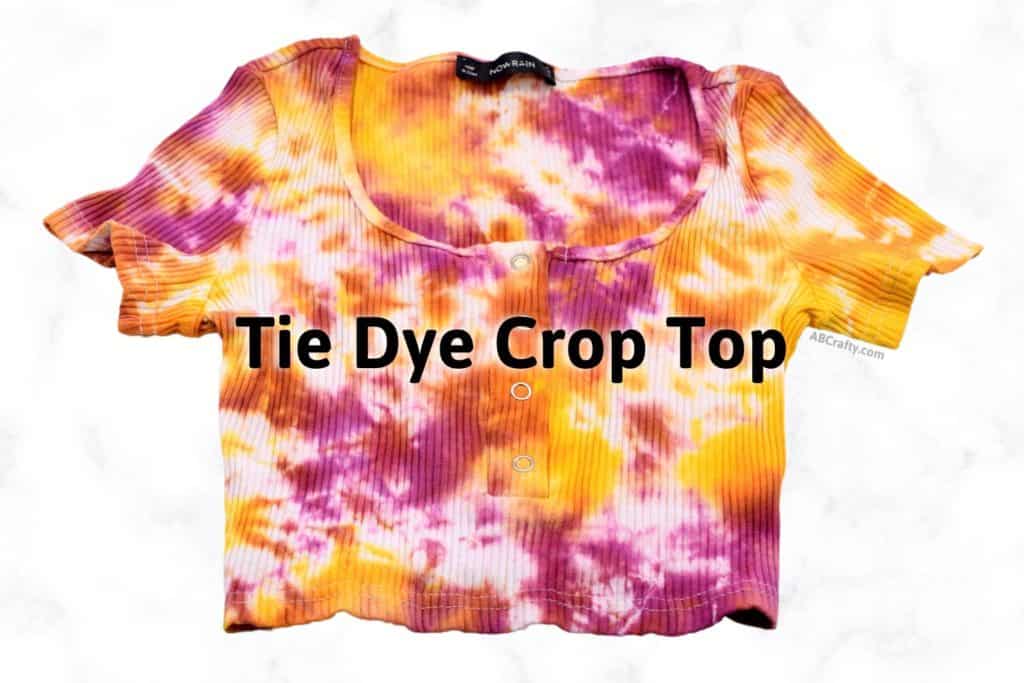
Tie Dye Crop Top

pink, orange, and yellow dyed crop top with the title "tie dye crop top"

Make your own tie dye crop top or a few! It’s super simple and in just a few steps you’ll have a beautifully dyed crop top.

Table of Contents

Note: Some links in this post may contain affiliate links, which means at no cost to you, I may earn a commission.

I recently moved to Nashville so now with it being in the middle of summer, I’ve gotten a bunch of crop tops. So naturally now I need to tie dye some! I’ve made plenty of tie dye shirts, but this was my first crop top. I was worried since it’s smaller that I wouldn’t be able to get the effect and all the colors I wanted, but it came out great!

I kept it simple for this one, but you can use any dyeing method you’d like, including the ice tie dye technique or using pastel colors. Or if you have a colored crop top, you can bleach tie dye it.

Be sure to also check out this guide on the best tie dye kits to find the right one.

Get the latest DIY tutorials, reviews, and crafting updates

You'll never be spammed and can unsubscribe at any time

Which Crop Tops are Best to Tie Dye?

You want to get one that is white and 100% cotton (this is similar to the one I used). The reason you need 100% cotton is because polyester and other synthetic materials don’t absorb the dye from tie dye kits very well. However, if you’re unable to find one that is 100% cotton, anything above 60% cotton will still work well. Less than that and you’ll get a pastel color.

Then the white material helps the colors show up the best. However, you’re welcome to get a colored one, but know that the colors you dye it will come out slightly different. That being said, another option is to dye the crop top with the bleach tie dye method in which you don’t use any dye at all!

The tops below are either 100% cotton or close to it so you can choose the style you like the best.

Don’t forget to pin it so you can easily come back to it later!

pink, orange, and yellow dyed crop top with the title "DIY tutorial - tie-dye crop top, how to easily make a tie dye crop top, abcrafty.com"

Materials to Make a Tie Dye Crop Top

How to Make a Tie Dye Crop Top

I kept the design of this tie dye crop top simple by using the scrunch method. That being said, you can also create any other tie dye pattern or use a different technique such as ice dyeing.

This is what the original shirt looked like. This is the one I got, but it’s not in stock anymore so this one is pretty similar.

plain white cotton crop top on a table

Prepare the Tie Dye Crop Top

I always recommend that you wash items before dyeing them. Washing them removes any chemicals, oils, or anything else that may prevent them from accepting the dye.

So if you wash your top first, then you can simply take it out of the wash. Otherwise, first wet the top and squeeze out the excess water. (Wetting it helps the shirt compress more so you can get more detailed designs)

soaking the shirt in a bucket of water

I went with a simple scrunch dyeing method for this crop top. All you need to do is scrunch it up. You can be as random or methodical as you’d like.

Or you can fold and twist into another tie dye design.

scrunching the crop top with hands

Then wrap it with rubber bands (this is the pack I have) so it’s secure.

Note: When using the scrunch tie dye method, I tend to use rubber bands instead of zip ties because they just need to hold the scrunches in place. But you can also use zip ties (I like these since they’re reusable).

putting a rubber band around the scrunched up top

Here’s how it looks all scrunched and tied.

white top scrunched and wrapped in rubber bands

Prepare the Soda Ash Mixture for the Tie Dye Crop Top

If you’re using a kit without soda ash, you can skip this step, though I don’t recommend it. I always recommend using soda ash when tie dyeing to get the most vibrant color. You can get an extra bag here.

You’ll want to mix 1 cup of soda ash to 1 gallon of warm water. Mix it until the soda ash is completely dissolved.

Get the latest DIY tutorials, reviews, and crafting updates

You'll never be spammed and can unsubscribe at any time

pouring soda ash into a clear plastic tub of water

Then soak the top in the soda ash mixture for at least 20 minutes.

Tip: It’s a good idea to squeeze the top and flip it over to make sure the mixture really soaks into it.

I like to do my tie dye projects at the same time so I’ll soak a bunch of items at once. In this case I also soaked it with some sweatpants for the pastel dye project and a zip hoodie.

tied up top soaking in a large plastic bin filled with soda ash solution, soaking alongside sweatpants and a sweatshirt

Prepare the Dye

Put on your gloves (I recommend getting your own pair like these since the ones with the kit tend to be very big and difficult to use).

Prepare the dye according to the instructions on the tie dye kit. Typically you fill the bottle to the line with warm water and then shake it until the dye dissolves.

Tip: I recommend filling the bottle only a little bit and dissolving the dye in that. Then fill the bottle the rest of the way. This helps minimize any spills and leakage.

For this one I knew the colors I wanted to use were yellow, orange, and a dark pink/merlot color. The colors I had were only blue, yellow, pink, and black so I needed to mix my own colors.

You can easily combine dye colors by mixing them in a bottle (such as these) or in a container (I like to reuse yogurt containers). You can then test how they will roughly look by dripping a small amount on a paper towel.

pouring dye from a squeeze bottle into a yogurt container with a plastic spoon in it
pouring dye from a plastic spoon onto a paper towel with different shades of pink on it

Dye the Crop Top

Lay down plastic wrap on the table and place the shirt on top.

If you’re using dye from the bottle, start with the lightest color and place it wherever you’d like.

Tip: Leave plenty of white space to allow for other colors.

pouring yellow dye from a squeeze bottle onto the white tied up shirt

Continue to add different colors randomly around the top.

If you mixed colors, you can use a spoon to add the dye.

Tip: Use a paper towel to wipe up as you change colors so you don’t get color where you don’t want it! 

pouring orange dye from a spoon onto a tied up shirt with yellow and orange dye on it

Press the dye into the top to make sure it goes through the whole shirt.

You want the shirt fully saturated with dye, but not dripping.

pressing red dye into a tied up shirt with yellow and orange dye on it

This is how mine looked fully dyed.

completely dyed crop top with orange, red, and yellow dye on it

Finish the Tie Dye Crop Top

Wipe up any excess dye with a paper towel. Then wrap it tightly in the plastic wrap.

Leave it to set wrapped up for at least 6 hours. However, I recommend leaving it for at least 24 hours to get the most vibrant colors.

While it’s setting, make sure it doesn’t dry out. The moisture from being wrapped in the plastic helps the dye process.

wrapping the completely dyed top in plastic wrap

After the time is up, rinse it until the water runs clear.

I like to use cooler water first and then increase the temperature as the hotter water will cause the color to leave more quickly. Tip: Wear gloves while rinsing since there will still be some dye that comes out.

Then run it through the washing machine with other tie dye items just in case there’s an extra color bleeding.

Lastly, toss it in the dryer and your tie dye crop top is ready to wear!

Get the latest DIY tutorials, reviews, and crafting updates

You'll never be spammed and can unsubscribe at any time

If you make your own tie dye crop tops, I’d love to see them! Tag me on Instagram @ab.crafty!

front of the finished tie dye crop top with pink, orange, and yellow designs

In case you’re curious, this is what the back looks like. It’s very similar to the front because I pushed the dye all the way through the shirt.

I absolutely love the color combination of this one! I’m definitely going to use them again.

back of the finished tie dye crop top with pink, orange, and yellow dye

More Tie Dye Projects to Try

And be sure to find the right tie dye kit for your projects with this guide of the best tie dye kits.

Get the latest DIY tutorials, reviews, and crafting updates

You'll never be spammed and can unsubscribe at any time

pink, orange, and yellow dyed crop top with the title "DIY tutorial - tie-dye crop top, how to easily make a tie dye crop top, abcrafty.com"

Tie Dye Crop Top

Make your own tie dye crop top or a few! It’s super simple and in just a few steps you’ll have a beautifully dyed crop top.
Yield 1 Tie Dye Crop Top
Project Time 20 minutes
Setting Time 1 day
Total Time 1 day 20 minutes

Materials
  

  • 1 White Cotton Crop Top
  • 1 Tie Dye Kit
  • 1 Cup Soda Ash
  • 1 Gallon Water
  • Rubber Gloves
  • Rubber Bands
  • Mixing Containers optional
  • Plastic Spoons optional
  • Plastic Wrap
  • Paper Towels

Equipment

  • 1 Plastic Bin

Instructions
 

Prepare the Crop Top for Dye

  • Soak the shirt in water, squeeze out the excess, and scrunch it up. (This is similar to the one I used).
    1 White Cotton Crop Top
    scrunching the crop top with hands
  • Secure it with rubber bands
    Rubber Bands
    white top scrunched and wrapped in rubber bands

Prepare the Soda Ash Mixture and Top for Dye

  • Soak the top in soda ash solution for at least 20 minutes. Mix 1 cup soda ash with 1 gallon of warm water. You can get some on Amazon.
    1 Cup Soda Ash, 1 Gallon Water
    tied up top soaking in a large plastic bin filled with soda ash solution, soaking alongside sweatpants and a sweatshirt

Prepare the Dye for the Tie Dye Crop Top

  • Put on the gloves and prepare the dye according to the instructions on the tie dye kit. Typically you fill the bottle to the line with warm water and then shake it until the dye dissolves.
    Rubber Gloves, 1 Tie Dye Kit
  • Mix your own colors in separate containers.
    Mixing Containers, Plastic Spoons
    pouring dye from a squeeze bottle into a yogurt container with a plastic spoon in it

Dye the Crop Top

  • Lay down plastic wrap on the table and place the shirt on top. Add the dye one color at a time, pushing the dye into the shirt. Start with the lightest colors first (e.g. yellow).
    Wipe up the area with a paper towel between colors.
    Plastic Wrap, Paper Towels
    pouring yellow dye from a squeeze bottle onto the white tied up shirt
  • Continue adding dye until it's all covered.
    completely dyed crop top with orange, red, and yellow dye on it

Finish the Tie Dye Crop Top

  • Wrap it in plastic wrap and leave to set for 24 hours.
    wrapping the completely dyed top in plastic wrap
  • Rinse them until the water runs clear. Then run them through the washing machine. Then your tie dye crop top is ready to wear!
    front of the finished tie dye crop top with pink, orange, and yellow designs
Keyword Clothing, Crop Top, Shirt, Tie Dye, Tie Dye Kit
Picture of Daniela Kretchmer

Daniela Kretchmer

Daniela is a lifelong crafter who loves to share her passion for crafting. Through classes or learning on her own, she likes to say she'll do pretty much any craft aside from scrapbooking. Her current personal obsessions include garden crafts, felting, and spinning yarn.

More Craft Projects and Ideas

Leave a Comment

Your email address will not be published. Required fields are marked *

Rating