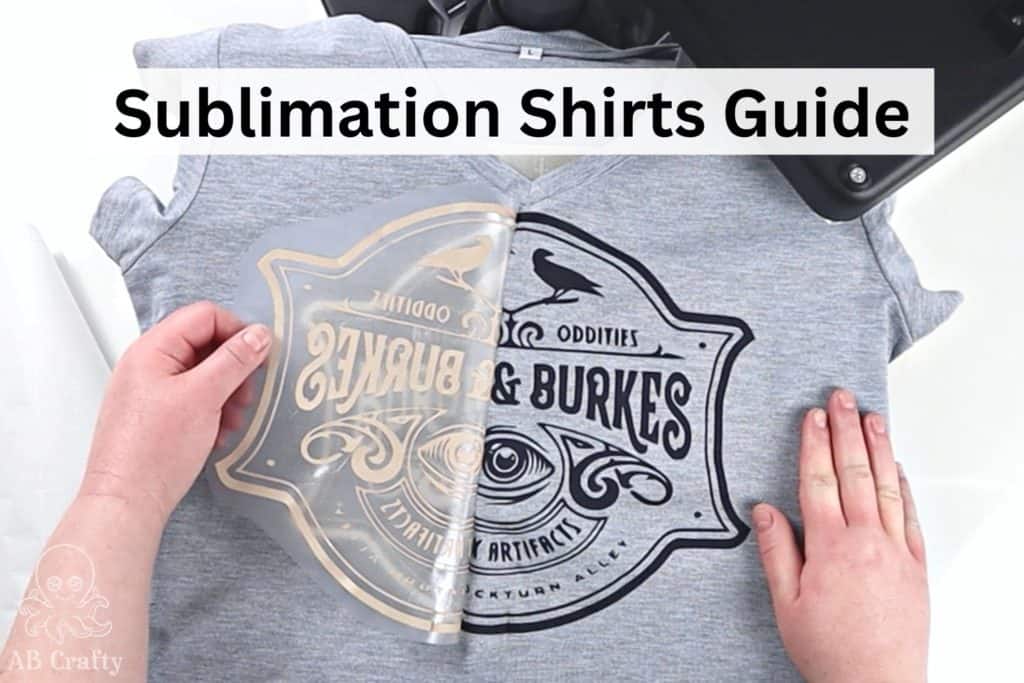
Sublimation Shirts – Beginner’s Guide to Sublimation T-Shirts

peeling the plastic of the infusible ink off of the cricut infusible ink shirt with the title "sublimation shirts guide"

Make perfect sublimation shirts every time with this easy to follow guide. Also learn which shirts are best for sublimation.

Table of Contents

Note: Some links in this post may contain affiliate links, which means at no cost to you, I may earn a commission.

One of my new recent obsessions is making sublimation shirts. I was sent a bunch of products to test out and have been hooked with sublimation ever since. The first thing I made with my heat press and Xtool is a shirt, cutting out a design from infusible ink. It’s a great first project and introduction into sublimation shirts so figured it’s perfect for a beginner guide.

So if you’ve ever wanted to make your own custom clothing pieces, now you can!  Whether it’s for yourself or someone special, designing your very own t-shirt with pictures or just words that highlight what makes you unique is a fun way to express yourself. This guide will walk you through the process of sublimation shirt making. I’ll cover what sublimation is and how it works, which shirts are best for sublimation, and finally the step-by-step tutorial on how to make sublimation shirts using infusible ink or sublimation paper. You’ll find everything you need to know about crafting beautiful personalized garments!

And if you want to make your own designs, you can make your own sublimation printer and use sublimation ink.

Get the latest DIY tutorials, reviews, and crafting updates

You'll never be spammed and can unsubscribe at any time

What are Sublimation Shirts?

Sublimation shirts are shirts that you can customize with text or graphics that are dyed directly into the shirt so that you can’t feel them. You can cut or print your design using sublimation ink and then use a heat press to infuse the ink directly into the fabric, dyeing it. Therefore unlike other methods of customizing shirts, using sublimation means you can’t feel the design on top of your garment. This also means your designs won’t crack or fade over time.

finished sublimation t shirt with the borgin and burkes logo

Which Shirts are Best for Sublimation?

When it comes to sublimation shirts, the most important factor is choosing the right t-shirt material. The best sublimation shirt materials are 100% polyester, but you can also use a polyester blend. Make sure that you’re using at least 60% polyester, but know that even at 60% the color won’t be as vibrant.

The fabric not only needs to be able to withstand the heat of the sublimation process, but also you want to use material that will give you the most vibrant color. Therefore lighter colors will allow your design to show up best. If you’re using color in your design, a white shirt will give you best outcome. The main thing to keep in mind is the color of the shirt will affect the color of your design. Similarly, the darker the color will make your design pop less.

These are some great options of 100% polyester shirts:

There are ways to use sublimation on cotton shirts, non-polyester shirts, and colored shirts, but that requires either DTF or sublimation paper specifically for cotton and uses a different process.

Don’t forget to pin it so you can easily come back to it later!

peeling the plastic of the infusible ink off of the cricut infusible ink shirt with the title "sublimation shirts guide"

Materials to Make Sublimation Shirts

Instructions to Make Sublimation Shirts

Create and Cut the Design

You can cut out your design by hand with scissors or a blade, but I prefer to use a cutting machine. If you’re a crafter and don’t yet have one, I highly recommend it, especially if you plan to make a lot of sublimation items. I just received the Xtool so wanted to test it out.

Simply upload your design to the software (this is the Borgin and Burkes design I used) and adjust it to the size you want. I was using a large women’s shirt so I made it 8 inches wide.

Then be sure to mirror the image! Otherwise your design will end up backwards.

On the Xtool I selected the blade cut and then PU Heat Transfer Vinyl setting and it worked perfectly. On a Cricut, use the “custom settings” and select Infusible Ink.

xtool creative space interface with borgin and burkes image

Next, load your infusible ink onto the cutting mat. Make sure it’s face up! And press start on the machine.

open xtool with the light grip mat and black infusible ink on top

After it’s done cutting, use a weeding tool (such as these) to remove the negative space. I also like to cut around the design so you’re not working with as much material.

Tip: Leave at least half an inch around your design of blank space to help stick it to your shirt.

cut and weeded black infusible ink with the borgin and burkes logo

Get the latest DIY tutorials, reviews, and crafting updates

You'll never be spammed and can unsubscribe at any time

Prepare the Sublimation Shirt

Preheat your heat press and adjust the pressure based on the shirt you’re using and the infusible ink transfer sheet. My settings said to use 385 degrees F for 40 seconds and medium pressure so I adjusted my heat press accordingly (this is the one I used).

For full details on how to use a heat press, here’s my full guide to the Vevor heat press.

setting the temperature on the vevor heat press

While the press is heating up, place your shirt on it and put a sheet of parchment paper under the layer you’re going to print. Another option is putting just the layer you’re printing on the heat press.

Note: The purpose of the parchment paper is to make sure your design doesn’t transfer to the other side of the shirt. If you don’t separate them or put parchment paper between them, the design will transfer.

showing parchment paper on top of a cricut infusible ink shirt on top of a heat press

Use a lint roller (Amazon) to remove any dust particles, pet hair, and stray fibers. If they get caught in the process, you’ll have tiny blank or dull spots since the dye will fuse to those fibers instead.

using a lint roller on a cricut infusible ink shirt on top of a heat press

Once the heat press is at temperature, you can press the shirt for a few seconds to make it perfectly flat and also preheat the shirt.

Then you want to place your design on the shirt. Make sure there are no air bubbles and the edges are secure.

Tip: Fold the design in half and give a crease at the top and bottom to find the middle point. This will help align it. You can also get alignment tools such as this one to make it even easier.

folding the weeded infusible ink in half
placing the weeded sublimation paper on the cricut infusible ink shirt

Press The Sublimation Shirt

Cover your design with another piece of parchment paper.

placing parchment paper over the sublimation paper

Then start your heat press. With the one I have, you pull down on the lever and press start to start the timer.

closing the vevor heat press and pressing the start button

When the time is up, carefully lift the handle and swing the machine away.

Then leave the design to cool. Remember, in sublimation, the cooling is what seals the ink. The heat is what turns it into a gas and then the gas turns into a solid when cooled, infusing into the shirt fibers.

finished heat pressed sublimation shirt with the heat press open and parchment paper on top

Once the shirt and infusible ink is completely cool, carefully peel off the design. This is referred to as a “cold peel” since you’re peeling the design when it’s cold.

peeling the plastic of the infusible ink off of the sublimation shirt

Remove the parchment paper from the middle and your shirt is ready to wear!

If you make your own sublimation shirts, I’d love to see them! Tag me on Instagram @ab.crafty!

Get the latest DIY tutorials, reviews, and crafting updates

You'll never be spammed and can unsubscribe at any time

holding the finished sublimation shirt on the heat press with the borgin and burkes logo

Frequently Asked Questions

How does sublimation work?

In chemistry, sublimation is the process of moving directly from a solid to a gas or vice versa. A well known example is dry ice – the dry ice at room temperature changes from a solid block to a gas, giving a fun spooky feel to Halloween time!

In the crafting and textile world, sublimation refers to using sublimation ink or sublimation paper to dye material. The ink starts in a solid form and then through heat, turns into a gas. As the gas cools, it settles into the fibers of the fabric, dyeing it. In order to ensure the design is clear, you use a heat press to apply pressure, keeping the design intact.

What are the benefits of making sublimation shirts?

Sublimation shirts create vibrant and detailed designs that don’t feel like anything is there. They also won’t peel away or crack like sometimes can happen with vinyl or other materials. Because it’s resistant to water, it also will not fade as quickly as other materials. It’s a great way to make unique and custom shirts without the hassle of traditional screen printing. 

How do I care for sublimation shirts?

​Thankfully there isn’t anything special about caring for a sublimation shirt vs another shirt. Because the dye is infused in the shirt, there isn’t any worry about your design peeling off! Therefore simply follow the washing instructions of your shirt.

What's the difference between sublimation shirts and screen printing a shirt?

The main difference between sublimation shirts and screen printing a shirt is the process. With sublimation, you’re using sublimation ink to dye the material. You can cut your design from infusible ink transfer sheets, print a design from the computer using a sublimation printer, or even draw your own design with sublimation ink pens. This design is then pressed into the fibers using heat and pressure. Once it cools, the shirt is ready to wear.

Screen printing, on the other hand, is a more invasive process that uses a screen with the design on it. Then paint or ink is applied manually over the screen to dye or paint the shirt. Depending on the material used, you may feel the design on the shirt after screen printing.

What's the difference between sublimation shirts and heat transfer vinyl shirts?

The main difference between sublimation shirts and heat transfer vinyl (HTV) shirts is you can feel HTV on the shirt, but you can’t feel the design from the sublimation shirt. Additionally, HTV can come in all sorts of patterns and designs such as glitter, puffy, holographic, glow in the dark, color changing, etc. Whereas sublimation shirts are limited to colors without any affects.

Furthermore, sublimation shirts won’t fade or crack like HTV can.

More Fashion and Customization Crafts to Try

Get the latest DIY tutorials, reviews, and crafting updates

You'll never be spammed and can unsubscribe at any time

peeling the plastic of the infusible ink off of the cricut infusible ink shirt with the title "sublimation shirts guide"

Sublimation Shirt

Make perfect sublimation shirts every time with this easy to follow guide.
Yield 1 Shirt
5 from 1 vote
Project Time 20 minutes
Total Time 20 minutes

Materials
  

  • 100% Polyester Shirt
  • 1 Infusible Ink Transfer Sheet
  • Parchment Paper
  • Design to be Transferred

Equipment

  • 1 Heat Press
  • 1 Cutting Machine or Scissors
  • Weeding Tools
  • Lint Roller

Instructions
 

  • Upload design to software and adjust the size so that it fits the shirt. Mirror the image. (this is the design I used)
    Design to be Transferred
    xtool creative space interface with borgin and burkes image
  • Cut out the design using the blade cut setting for the Xtool or the Infusible Ink setting for a Cricut.
    1 Infusible Ink Transfer Sheet
    open xtool with the light grip mat and black infusible ink on top
  • Weed the negative space with weeding tools such as these.
    cut and weeded black infusible ink with the borgin and burkes logo
  • Preheat the heat press and adjust settings based on shirt and infusible ink transfer sheet being used. Place the shirt on heat press and put parchment paper underneath the layer to be printed. (This is similar to the press I have).
    100% Polyester Shirt, Parchment Paper
    showing parchment paper on top of a cricut infusible ink shirt on top of a heat press
  • Use a lint roller to remove dust particles, pet hair, and fibers.
    using a lint roller on a cricut infusible ink shirt on top of a heat press
  • Place the design on the shirt making sure there are no air bubbles and the edges are secure - use alignment tools if needed.
    placing the weeded sublimation paper on the cricut infusible ink shirt
  • Cover the shirt with parchment paper and press for the recommended time.
    closing the vevor heat press and pressing the start button
  • Allow the design to cool and then peel off when fully cooled.
    peeling the plastic of the infusible ink off of the sublimation shirt
  • Remove parchment paper from middle of the shirt and the sublimation shirt is ready to wear!
    holding the finished sublimation shirt on the heat press with the borgin and burkes logo
Keyword Heat Press, Infusible Ink, Shirt, Sublimation, Sublimation Ink
Picture of Daniela Kretchmer

Daniela Kretchmer

Daniela is a lifelong crafter who loves to share her passion for crafting. Through classes or learning on her own, she likes to say she'll do pretty much any craft aside from scrapbooking. Her current personal obsessions include garden crafts, felting, and spinning yarn.

More Craft Projects and Ideas

3 thoughts on “Sublimation Shirts – Beginner’s Guide to Sublimation T-Shirts”

  1. 5 stars
    Thank you so much for your step-by-step on this! I’m always looking for “the new thing” to keep business running, but this seems to be something that everyone would always need!
    -Geralyn

  2. I’m new to Sublimation and I’m having a hard time trying to figure out the Heat Temperatures for TShirts. I’m using 100% cotton a have burned several shirts. Could someone please help me.

    1. Hi, for sublimation you want to make sure you’re using polyester to get the most vibrant color.
      What settings are you using and what sublimation product are you using? Cotton can withstand higher temperatures than polyester so it’s odd to hear it’s burning.
      You want to follow the instructions for the sublimation product you’re using – for the shirt in this tutorial it was 385 F for 40 seconds.

Leave a Comment

Your email address will not be published. Required fields are marked *

Rating