Learn how to use a yarn swift to untangle a hank or skein of yarn. There’s also a guide to find the best swift for your needs.
Table of Contents
If you knit, crochet, spin your own yarn (or really do any kind of fiber craft), then chances are you may be interested in a yarn swift.
Using it allows you to untangle a skein or hank of yarn to be used for something else. Once untangled you can wind it into a ball, count the yardage, or even knit directly from it. I absolutely love having a yarn swift, and even included it in my list of the best gifts for crocheters and knitters.
You can also use it with a yarn winder to create a center pull ball or with a niddy noddy to measure the length of the yarn.
Note: Some links in this post may contain affiliate links, which means at no cost to you, I may earn a commission.
What is a Yarn Swift?
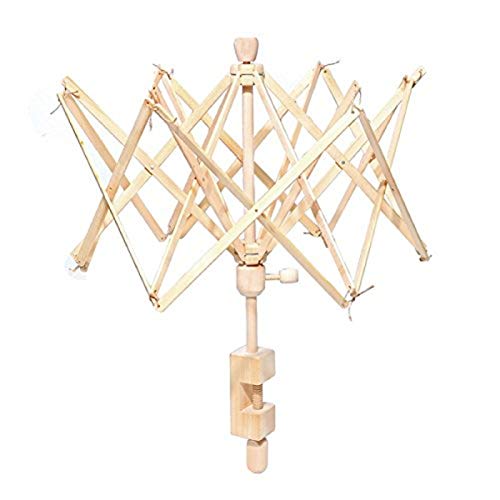
A yarn swift is a device that you can place a skein or hank of yarn onto to help untangle the yarn.
By placing the yarn on a swift, you can pull on one end and untangle the yarn. From there, you can use a niddy noddy to measure the yardage, you could wind it into a ball with a yarn winder, or you could even knit or crochet directly from it.
Which is the Best Yarn Swift?
There are two different styles: tabletop and umbrella. I personally have an umbrella because it takes up less space and I find them easier to use. Then between the two styles, you can choose the material – typically they’re made of wood or plastic.
Here are my recommendations for the best yarn swift:
- Best Budget Swift (Amazon)
- Best Wooden Swift (Amazon or Knit Picks)
- Best Tabletop Swift (Amazon)
Best Budget Yarn Swift
This is the one I have and can confirm it does the job. It’s incredibly compact, which I love and it comes with a case to keep it all contained. It’s lightweight so it’s easy to expand and use.
The only drawback is the yarn can sometimes get caught in the metal rings at the bottom corners of the swift. For the price though, it’s worth the occasional adjustment.
Best Wooden Swift
Wooden swifts are what most people picture when they think of a swift. The wood is beautiful and durable and the yarn is less likely to get caught in any metal pieces. This one from Knit Picks is my favorite, but you can find similar variations on Amazon.
The only real drawbacks are they are slightly heavier and larger than plastic ones.
Best Tabletop Yarn Swift - Stanwood Tabletop Yarn Swift
Tabletop yarn swifts are just as they’re named – for the tabletop. Unlike umbrella swifts, tabletop swifts don’t use a lever for adjusting. Instead, you move pegs to fit your skein or hank.
This one in particular (the Stanwood Tabletop Yarn Swift) can be broken down for portability so there is an added advantage there.
How to Use a Yarn Swift
Each swift is slightly different (as shown above in my list of the best), but most have similar parts as the second image. There’s a part that fits under the table and over the table. Then there will be some kind of wheel or nob to tighten it. I’m using my plastic one for this demonstration.
Identify the lever to raise and lower the swift. Pull up and down on the lever to raise and lower it. Depending on the length of the skein or hank, you’ll want to make it bigger or smaller.
Start by making it slightly bigger so the skein has something to sit on, but isn’t too big so you can easily slide the skein over.
Place the skein of yarn over the swift to the middle.
Then pull the skein to one side while lifting the lever to fit the skein.
Typically the skein or hank will come with ties around it so now would be a good time to cut them off.
The yarn is now ready to use, nicely untangled!
Find one of the ends of the yarn. You can attach it to a yarn winder to wind it into a ball, knit directly from it, use a niddy noddy to measure the skein, or whatever else you would like.
As you pull the yarn away, the swift will turn, unwinding the yarn from the hank.
Get the latest DIY tutorials, reviews, and crafting updates
You'll never be spammed and can unsubscribe at any time
Frequently Asked Questions
How Do You Use a Yarn Winder and Swift Together?
Using a yarn winder and swift together allows you to take a hank or skein of yarn and wind it into a ball or cake of yarn in just a minute.
Typically the process of turning a hank or skein of yarn into a ball can be annoying, but by using both items together, the process is quick and easy.
Simply pull the yarn from the swift and attach it to the yarn winder using these instructions.
What Can You Use Instead of a Yarn Swift?
When I first started spinning my own yarn, I actually used the back of a chair. I placed the skein over the back and pulled the yarn upwards.
The challenge with this is the yarn can still get tangled because there isn’t tension.
You can improve this by using two chairs spaced apart and shaking the yarn a bit when it gets caught.
More Yarn Crafts and How-To's
Get the latest DIY tutorials, reviews, and crafting updates
You'll never be spammed and can unsubscribe at any time
How to Use a Yarn Swift
Materials
- 1 Hank of Yarn
Equipment
- Yarn Swift
Instructions
Add the Hank of Yarn to the Swift
- Attach the swift to the table.Identify the lever to raise and lower the swift. Pull up on the lever to make the swift slightly bigger so the skein has something to sit on, but isn’t too big so you can easily slide the skein over.
- Place the skein of yarn over the swift to the middle.Then pull the skein to one side while lifting the lever to fit the skein.1 Hank of Yarn
- If the yarn came with ties around it, remove them.
Use a Yarn Winder and Swift
- The yarn is now ready to use, nicely untangled!Find one of the ends of the yarn. You can attach it to a yarn winder to wind it into a ball, knit directly from it, use a niddy noddy to measure the skein, or whatever else you would like.