Learn how to use a yarn winder to easily make a ball or cake of yarn with two ends (also known as a center pull ball). There’s also a guide to find the best yarn ball winder for your project.
Table of Contents
If you knit, crochet, spin your own yarn (or really do any kind of fiber craft), then chances are you may be interested in a yarn winder. Sometimes the yarn you’re working with gets tangled or you need to work with two ends at a time. Or sometimes you may only want a small portion of a larger ball of yarn (while traveling, for example).
A winder allows you to take one a hank, skein, cake, or ball of yarn and make it into a tidy ball of yarn with two ends (a center pull ball). I love mine so much I’ve included it in my recommendations for the best knitting and crochet gifts.
You can also use a winder with a yarn swift to make it easier to turn a hank or skein into a ball.
Note: Some links in this post may contain affiliate links, which means at no cost to you, I may earn a commission.
What is a Yarn Winder?
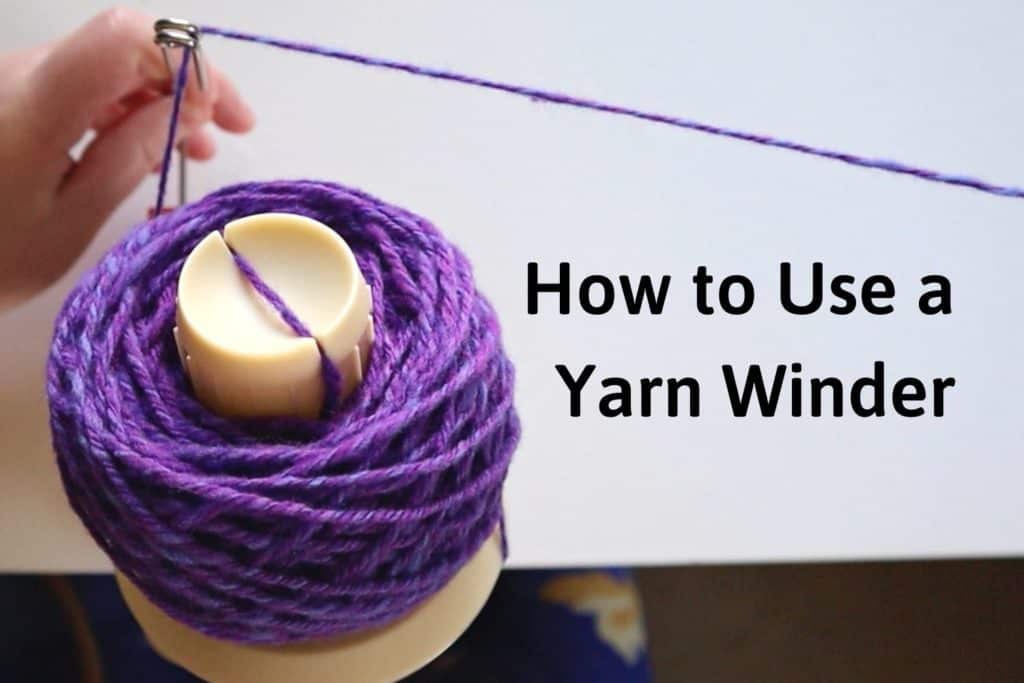
A yarn winder is used to make a “cake” of yarn that can be used from both ends. Some knitting or crochet projects may require to strands of yarn. Instead of buying two sets of yarn for your project, you can use a winder to make a single ball from which you can use two strands.
The balls of yarn that winders make are also nicely wound up so they don’t tangle, which is typically what happens when you try to use a hank or skein from the store.
Which is the Best Yarn Winder?
Surprisingly enough, there are different kinds of ball winders. Factors include the material, durability, and size of the ball of yarn (technically, cake of yarn) you want to make.
Here’s a summary of the best ones to choose from:
Best Overall - Knit Picks Yarn Ball Winder
This yarn ball winder from Knit Picks is the best overall because of its price, durability, and colors.
It can wind up to 3.5 oz of yarn, which is standard.
The purple and white colors are just beautiful, relative to other yarn ball winders on the market so personally, I think this one is the prettiest. But looks aside, it’s also very durable. Other winders can feel flimsy and the metal feeder can fall over while using it. But that doesn’t happen with this one.
So if you can shell out just a couple more bucks for this one, this is the one you want to get.
Best Budget Friendly - 3.5 oz Winder
This is actually the one I first purchased as a quick and cheap yarn ball winder. In addition to the yarn ball winder, you get a few extras including some plastic needles, thread trim, and stitch markers.
It’s the standard 3.5 oz size so you’re not missing out on anything in terms of size or function.
The only drawbacks are the 70’s colors and the metal feeder can occasionally fall during use, which is mildly annoying.
Best for Large Amounts of Yarn - Large Stanwood Yarn Winder
Naturally this one is going to be pricier, but you can get a whopping 10oz of yarn onto it. That’s almost 3x the size of a standard winder.
So if you’re looking to wind large amounts of yarn into a ball, this is the one you want to get.
Best Appearance - Wooden Yarn Winder
For something unique, you can get also get wooden ball winder. While most winders are made of plastic, this one is made of beautiful wood.
It works the same as any other ball winder, with the added benefit that you don’t have to attach it to a table to use it. Simply place it on the table to use.
The drawback is that it takes up more room, but since it’s made of wood it’s at least beautiful to look at it.
Bonus - Jumbo Yarn Ball Winder
Here’s a bonus recommendation if you’re looking for a large yarn ball winder, but at a lower price. This one will wind up to 8 oz of yarn so it’s roughly double the size of a standard winder.
How to Use a Ball Winder to Make a Center Pull Ball
Attach the Winder to the Table
Start by attaching your yarn ball winder to the edge of the table. This is the one I’m using, but you can go above to my list of the best ones. And since creating this tutorial, I’ve upgraded to the Knit Picks winder.
There’s typically a part that sticks out on the bottom (I’m pointing to it in the image). This part goes under the table. Then use the wheel on top to tighten.
Pass the Yarn through the Feeder
Lift the metal feeder and lock it in place. Typically you’ll be able to lift it up and then pull it out to lock it.
If you’re super coordinated, you can simply feed the yarn through the feeder. For the rest of us, however, they’ve designed the feeder so you don’t have to be so coordinated.
Start by placing the yarn under the feeder.
Then lift the yarn up and to the left.
This will pull the yarn between the two loops.
Bring one end over to the right and down.
Then simply pull the yarn back to the left and you’ll have yarn that goes through the feeder.
Attach the Yarn to the Winder
There is a slit at the top of the winder. Place the yarn over the slit and pull down lightly to tuck it in.
Then start to turn the crank.
I like to hold the yarn with one hand against the middle of the winder. This way as the winder turns, it will secure the end in place.
Continue to turn the crank until you’ve finished winding the amount of yarn you want. Be sure to keep the tension even on the yarn as you turn it.
Tip: If the feeder falls down, make sure it’s secure and locked into place. The other option is simply hold it with one hand.
Lift your yarn off of the winder.
If you want a center pull ball, grab the yarn that’s across the middle post before lifting off.
Now you have your new cake of yarn.
Get the latest DIY tutorials, reviews, and crafting updates
You'll never be spammed and can unsubscribe at any time
And you can see with this cake below that you now have access to both ends of yarn.
Frequently Asked Questions
How to Keep the Feeder Standing Up
You can either hold the feeder up with your hand or pull it out and turn it to make sure it locks.
It can also help to have the yarn come in from the left instead of the right. This way the pressure is in the direction to keep the feeder upright.
What to Do if the Yarn Starts Winding Around the Base
If the yarn is getting caught under the base of the winder, that likely means the yarn was too loose. I find this happens because there’s an issue unrelated to the winder. Since I typically use a yarn swift with it, it’s because the yarn got caught on the swift.
If you’re winding directly from a ball or skein, check it as the tension may have changed.
More Yarn Projects and How-To's to Try
Get the latest DIY tutorials, reviews, and crafting updates
You'll never be spammed and can unsubscribe at any time
How to Use a Yarn Winder
Materials
- Yarn
Equipment
- Yarn Winder
Instructions
- Attach the winder to the table. There’s typically a part that sticks out on the bottom (I’m pointing to it in the image). This part goes under the table. Then use the wheel on top to tighten.
- Lift the metal feeder and lock it in place. Typically you’ll be able to lift it up and then pull it out to lock it.Start by placing the yarn under the feeder.Yarn
- Then lift the yarn up and to the left.This will pull the yarn between the two loops.
- Bring one end over to the right and down.
- Then simply pull the yarn back to the left and you’ll have yarn that goes through the feeder.
- Place the yarn over the slit and pull down lightly to tuck it in.
- Then start to turn the crank.I like to hold the yarn with one hand against the middle of the winder. This way as the winder turns, it will secure the end in place.
- Continue to turn the crank until you’ve finished winding the amount of yarn you want.
- Lift your yarn off of the winder.If you want a center pull ball, grab the yarn that’s across the middle post before lifting off.